
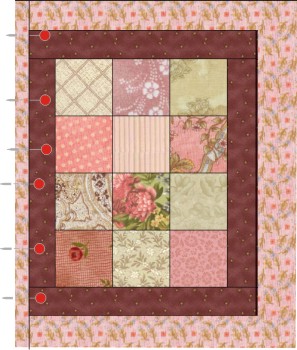
Hitty's Charm Quilt
Finished Size: app. 5 1/2" x 6 1/2"
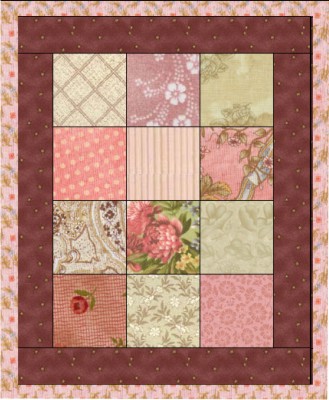
A charm quilt is where no two identical
fabrics are used.
Every patch is a different fabric.
Supplies:
Sewing Machine
Thread
Scissors
Needle
Straight Pins
Cutting Mat and Rotary Cutter (optional)
Iron and Ironing mat
Magic Sizing (about $.99, similar to but better than spray starch)
Measuring tape or ruler
12--1 1/2" x 1 1/2" different squares
1" strips for borders
backing
~*~*~ Some other links that may prove helpful. ~*~*~
How to have square quilts with a ripple-free border.
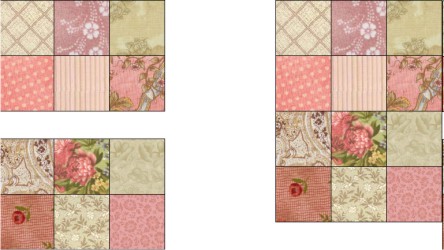
Step One
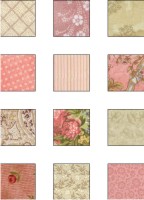
Cut 12--1 1/2" x 1 1/2" different squares,
and arrange them as you want them to be.
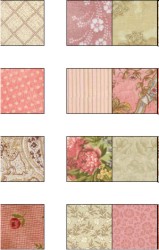
Step Two
When you sew these rows together, pin through the seams.
If one square is 'bigger' than another, try to ease it in.
If you always pin the seams, they will always line up.
If they do not line up--and it bothers you--you can 'unstitch' four or
five stitches on either side of
the seams, repin, and resew. Sometimes, you have to experiment with
turning the seams one
way or another. You can also pin the seams open on each other. In a
large quilt this is not recommended,
as it can weaken a quilt during use. However, in a doll-quilt it is
perfectly acceptable. The dolls rarely roll around or
throw up on the quilt so it has to be washed, lol.
Start to sew assembly line, as shown. Use a 1/8th inch seam if you can.
Spray the sewn part lightly with Magic Sizing, and press carefully.
~*~*~
TIP: When pressing, always lift and press
down, lift and press down, with the iron.
Never use a rubbing or back and forth motion.
These squares are so tiny, traditional ironing will stretch and distort
the squares.
~*~*~
Step Three
Repeat with the last row of squares.
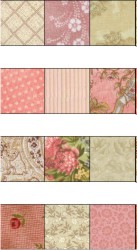
Spray the sewn parts lightly with Magic Sizing, and press carefully.
~*~*~
TIP: If you accidentally do get stretched
or distorted blocks--don't panic.
Simply spray the quilt with Magic Sizing, and repress.
Magic Sizing does not leave white flakes like spray starch, but
it can leave the fabric shiny, so don't overuse.
If you do overuse, simply swish the quilt in warm water when finished.
(no need to ask how I know this!!)
~*~*~
Step Four
Sew the rows together, stopping and pressing at each row.
When finished, give the top a once-over spray and pressing.
Step Five
It is time to add the borders and just as you would in a
real-life-sized quilt,
you will measure for the borders in this little quilt.
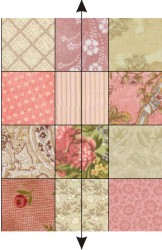
As the arrow shows, measure down the center of your quilt.
This measurement is the exact measurement of your two side borders.
Cut two now, 1" x the measurement you just took.
(In other words, if your quilt measure 5 1/4 inches from
top to bottom, cut
two strips that are 1" x 5 1/4".)
There is also a special way to pin on the borders.
1. fold the cut border in half and finger-press to find the center seam.
2. Pin this to the center of the side seam quilt.
3. Now, pin the top and bottom edges to the side of the quilt.
You may have to ease the order a bit, or perhaps the quilt,
if they do
not match perfectly. This is normal. Do not cut two sides strips of
unequal length.

Sew carefully, and then open, spray with Magic Sizing, and press carefully.
~*~*~
TIP: Do not cut a strip and sew it on, and
then cut off the left over part.
This just does not work for a quilt, no matter how fast it is.
Measuring first and then cutting the two side strips the same length
is the only way to guarantee a square quilt.
~*~*~
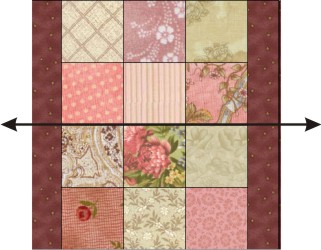
Step Six
You will repeat step five for the top and bottom borders, now measuring across.
Sew carefully, and then open, spray with Magic Sizing, and press carefully.
Note: If you want to add more borders, simply repeat steps five and six.
~*~*~
TIP: Traditionally, a quilt would have a
batt in between the top and the backing.
However, a miniature quilt will be much softer if you leave out the
batting.
~*~*~
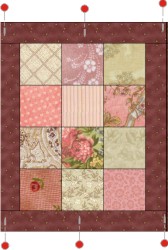
Step Seven
Once the top is finished, measure it, and then cut your
backing 1" bigger all the way around.
For instance, if your top measures 5 1/4" x 7", you would
cut a backing of 6 1/4" x 8".
Lay the backing wrong side up, and center your quilt on this.
Now, very carefully, fold one side up 1/4" (about) and then
fold it 1/4" (about) again. Pin this securely in place.
This forms a nice, smooth edge on the top of the quilt, a well as
giving you another 'border' effect.
Pin all around the quilt, and then handsew it in place.

~*~*~
TIP: Although you can, of course, machine
sew the backing down, it will
look much prettier if you can hand sew it in place.
~*~*~
Once finished, give your quilt a final light spray of Magic Sizing, and press lightly.