
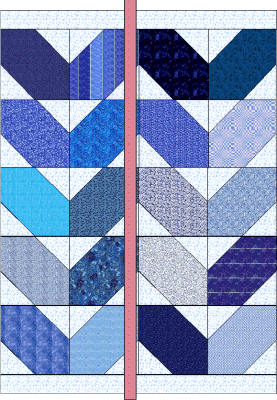
Hitty's Zig-Zag Quilt
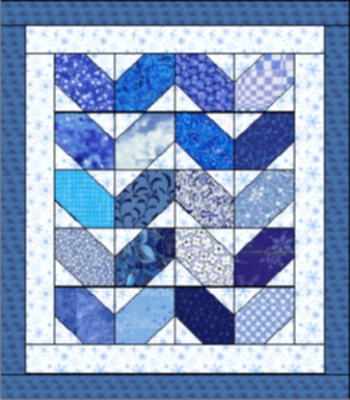
Finished size depends on how many borders you add.
'About' 5 1/2" x 6 1/2"
A charm
quilt is where no two identical fabrics are used.
Every patch is a different fabric.
But this is also a delightful little quilt using all the same fabrics!
Also, if you vary the amount of squares (we
used 20) it
can be made bigger or smaller.
Whatever you choose--have fun~!
Supplies:
Sewing Machine
Thread
Scissors
Needle
Straight Pins
Cutting Mat and Rotary Cutter (optional)
Iron and Ironing mat
Plastic Quilter's Square/Ruler
Magic Sizing (about $.99, similar to but better than spray
starch)
Measuring tape or ruler
20--1 1/2" x 1 1/2" different squares
40 1" x 1" background squares
1" strips for border
backing fabric
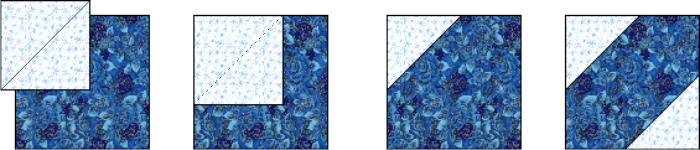
Draw a line from corner to corner on all 40 1" background squares. Now--if you are a confident sewer, since this is such a small
square, you can just wing it--but be careful to sew in a straight line!
Next, right sides together, place the 1" background square on the 1 1/2" print square. Sew on your drawn line, as shown.
Fold the corner of the smaller square up, and press. You should cut out the middle triangle, to avoid bulk.
Do NOT cut off the back triangle or the front.
Repeat this step for the opposite corner, and then for the rest of the print squares.
Step Two:
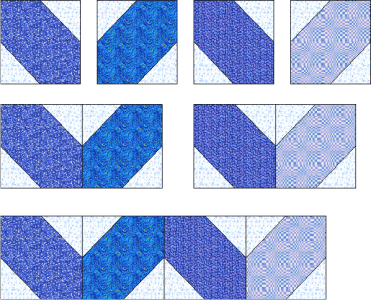
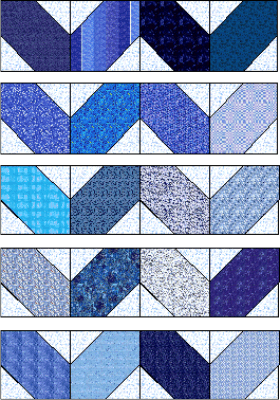
Now, you will sew together your rows, as shown. Repeat this for every row.
When sewing these together, line up the back print squares for accuracy. See?
There's a good reason not to cut them off!
Step Three:
Pin as shown below at every seam. Don't ever sew this without pinning! It just won't line up right.
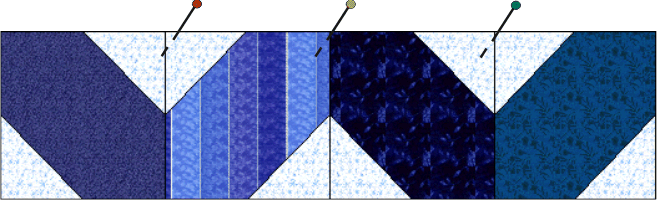
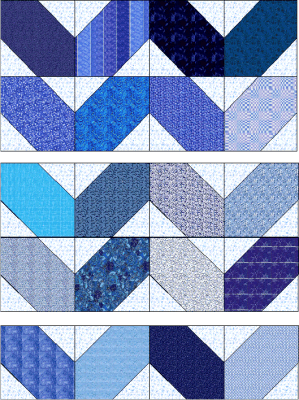
Sew the rows together.
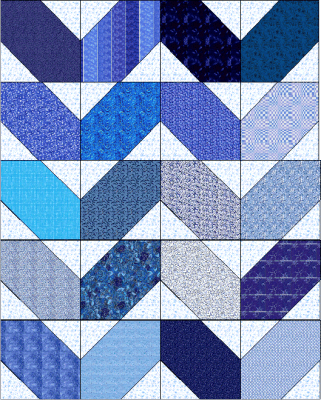
Step Four:
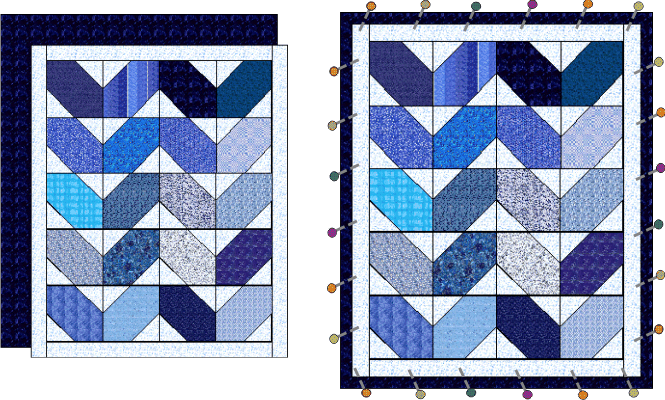
Now is the time to square up your quilt. Press (not iron back and forth; instead, lift and press) the quilt top.
Using a Quilter's Square, cut very little off the top and side, and then the bottom and side to even up the sides and top. Ideally, you can use
the square to make sure the quilt is the same size across top and bottom.
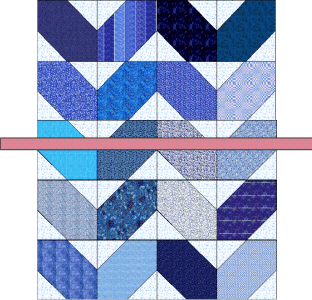
Once this is done, measure across the middle of the quilt. (Tape measure is represented by pink bar.)
Write this number down, and then cut two top and bottom borders the length of this number, and 1" wide.
When you try to sew the border on the top and bottom, it might not be the same length as the middle--no
worries, this is common. First, find the middle of the quilt and the middle of the border, and pin, right sides together.
Next, Pin the two ends. Finally, add several more pins, easing the quilt-top and border together.
Repeat for the bottom.
Carefully press borders open.
Step Five:
Repeat Step Four for the side borders.
Press carefully.
Now, you can continue to add as many borders as you choose, remembering to always pin and always measure through the middle.
Step Six:
We're going to add the backing last of all. Make sure your top is carefully pressed.
Center it on a piece of backing fabric at least 1" bigger around than
your top. Cut 1/2" from the edge of your top all the way around. The easiest way to do this is to use a plastic Quilter's Ruler.
Fold edge of backing over 1/4" and press on all four sides.
Lay quilt top wrong sides together, center, and then fold backing over onto the quilt top. Pin in place.
I recommend hand-sewing the backing down over the top, but you can machine sew if you go slowly,
Final step--press quilt, and sign on the back!
This is a lovely, versatile block. Here are some other ways to use it!
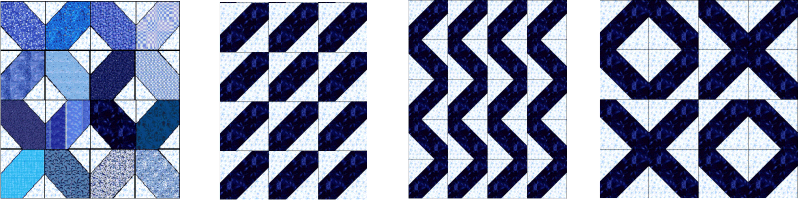
Another
popular use for this block is the Autograph, Signature, or Album block.
These quilts were often a
single block pattern signed by friends. Later, the
signatures on the quilts would be embroidered over to make them
last longer. During the Great Depression, it was a popular
past-time to send bleached muslin, silk or other white fabrics
to famous people, and ask for their autograph. These assembled
quilts were then often used as fund-raisers.
While this is by no means the only album quilt block pattern, it is one
of the simplest to make!
HOME