
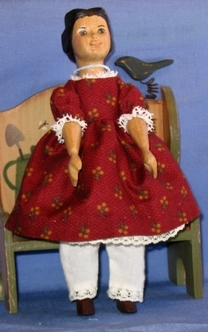
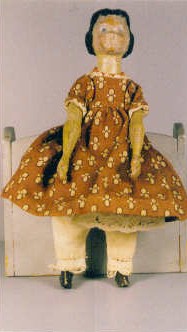
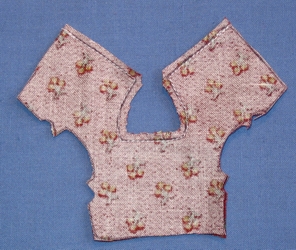
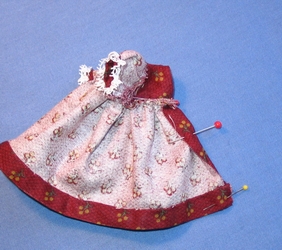
Our Version, modeled by Hitty Petal
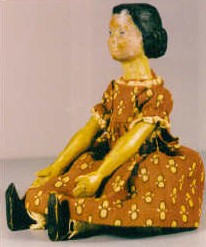
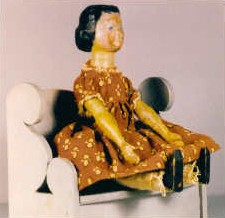
The Real Hitty, as seen at the Stockbridge Library, in Stockbridge, MA
If you would like to use the Crow's version of the Library dress fabric, I have it up for the public to purchase at Spoonflower.
The
Real Hitty's Clothing Class
Re-created
by the Crow

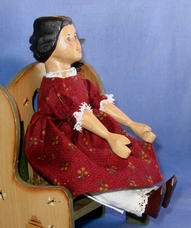
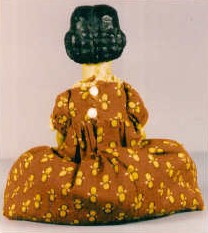
This photo was taken during the Stockbridge Hitty event in 2006,
and reflects the true color much better.
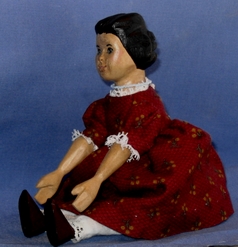
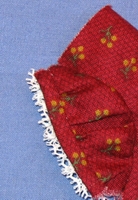
Our version of the Real Hitty's
Library Dress, Modeled by Hitty Petal.
The Real Hitty in the Library Dress
(as seen at the Stockbridge Library Museum, Stockbridge, MA)
Before we begin, some notes on this dress. First of all,
the Original version has much narrower shoulders
than I finished with in this
class. I found it was just too hard to sew to the narrowed shoulders.
I still
feel we ended up with a lovely replica of the Real Hitty's Library dress.
It is often referred to as the ‘Library
Dress’, and so we are calling it that for our class.
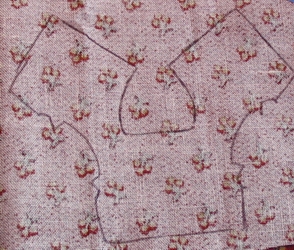
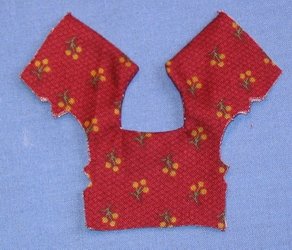
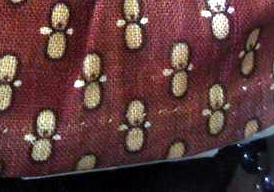
According to research it’s "...a
brick red or rust cotton with an off-white figure partially outlined in olive
green..." as shown above.
The dress is actually more rust than orange in
"real life", as you can see by the above picture—the pictures on
the first page are discolored.
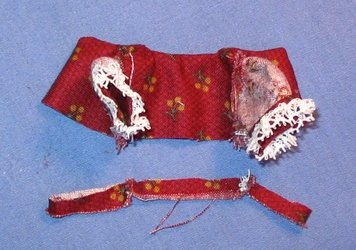
Supplies:
13"
x 8" of your dress fabric
app.
20 inches lace
2 'Pearl
Buttons'
Cotton
thread for button loops
Sewing
Machine
Scissors
Needle
and Thread
NOTE ON THE ORIGINAL DRESS
"...buttons are white pearl, rounded on top, with a self-shank
underneath,
through which a hole is drilled side to side for the thread..."

"...a very narrow, heavy lace..."
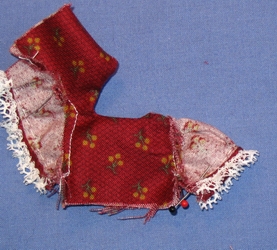
STEP ONE
Cut out the sleeves.
Cut out the sleeve bands: 2 1/2" x 1/2" (cut two).
Cut the skirt 3 1/2"" x 11" for the traditional length, and 4" x 11" for the longer length.
DO NOT cut the bodice out. It will be traced.
Cut out the bodice pattern.
TRACE it onto your fabric.
Make sure to trace in the points, as this is where
you will match your sleeves in a later step.

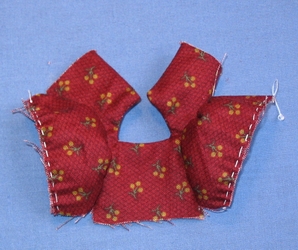
Sew up the back, around the neck, and down the other side of the back, as
shown.
Stay-stitch the beginning and end to prevent the seam from coming undone.
Stay-stitching is merely sewing a few stitches, reversing and sewing a few
stitches, and then proceeding.
This can also be known as a lock-stitch or
back-stitch.
Tip: SEW SLOW! The neck is a tricky curve, and you
will want to sew slowly to stay on the line.
How slow is 'slow'? You should
be able to see your sewing machine needle move up and down.
If you are sewing this by hand, I would suggest tiny stitches, and probably a
back-stitch as well.
Cut out bodice, using a 1/8th inch seam on the sewn part, and cutting on the
line on the rest.
Clip the curves and corners in the neckline. Press right now to set thread.
Tip: When pressing, if you spray with Magic
Sizing or Starch, you will get a crisper line than by merely pressing.
Also--pressing means pressing! Don't rub
your iron back and forth like regular ironing. This can create stretching and distortion
in the fabric.
STEP TWO
Turn right side out. Poke the corners of the back neck out for a nice, crisp
look.
DO NOT use scissors, a pencil, or any other sharp object to push these
corners out.
It is guaranteed that you will poke a hole right through the fabric.
(No need to ask how I might know this….)
I use a closed hemostat or sometimes a pressing stick made from a dowel.
Press carefully. It is too easy to distort this tiny bodice.

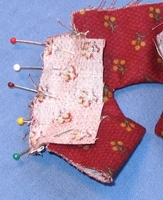
Gather the sleeve between points, and ease into the arm hole of the bodice by
pinning
as follows: First, pin at the matching points.
Then, pin the ends. Then, pin
the center. After that, you can add more pins if your gathers need smoothing.
Sew with the gathered side down and the bodice side up.
Note how the pins I have placed stick out away from the garment? This allows
the sewing
machine to sew right over the pins without catching the heads. I use French
Silk Pins, which are very small.
They are great for Hitty sewing.
Tip: If you make a double line of gathers (one above the other) the sleeve will gather more evenly.
STEP THREE
Once you have sewn in both sleeves, run a gathering stitch in the ends of the
sleeves.
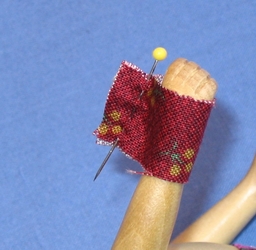
Take the band you cut for the sleeve, and pin it around your Hitty's hand
with 'about' a 1/4" seam.
Make sure it can slide on and off her hand. If it cannot, cut another band a
bit longer.

This is tricky--you need to place the band with the right side facing the
wrong side of the sleeve.
This is so when you get it sewn in place, you can bring it forward over the
seam.
Pin the two outer edges first, and then pin the center.
Place the remaining pins to spread the gathers evenly. Sew across, with the gathers on the bottom.
Turn the band up, and press. It will look 'wrong' because the seam is on the
front of the sleeve,
but this is the right way to do this band.
Fold the band over about 1/4" and press. Fold over again to the front of
the sleeve.
You just need a few pins to secure this, as you will be sewing by hand.
Hand-sew the band down onto the sleeve.
Cut two 4" lengths of lace for the sleeves. Gather.
Once the bands are sewn in place, add the lace.
The lace is cut in 4" lengths for the sleeve, and gathered with a running stitch before pinning to the sleeve.
Pin it across the back of the sleeve, making sure your gathers
are even. Tack on by hand.
Try not to let your stitches show through on the
front of the band.
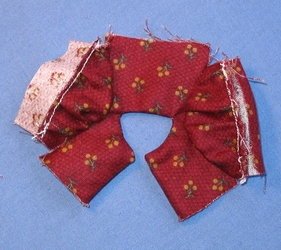
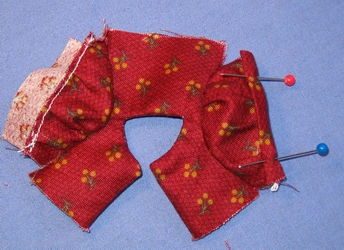
STEP FOUR
Now you will sew your underarm seams. Place a pin on the sleeve where the band meets.
Place a pin at the underarm seam where the sleeve meets the
bodice.
Sew very slowly up the side seam (starting at the waist, and using
stay-stitching) and down the sleeve.
Sew very carefully across the lace. You may want to sew that little
part by hand.
Clip the underarm seam in. I always trim my seams at this point, too. Repeat
for the other side.
Now, trim off about 1/4" of the bottom of the bodice, so there is just
about 1/4" under the arms.
The reason I have you do this now, and not make the original pattern small
enough to start with,
is that it would make sewing the bodice together nearly
impossible, since it is so tiny.
No need to wonder how I know this, either!
STEP FIVE
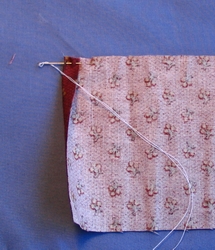
Take the skirt piece. Fold in 1/4" at beginning as shown above, and run
a gathering stitch across the top.
When you get to the other side, fold in
1/4" again. This is going to help make a finished-looking seam in the
back of the dress.
It's time now to pin the skirt to
the bodice. Don't gather it yet.
First, pin both ends to the bodice, right
sides together.
Then, find the center of the skirt and the center front of
the bodice, and place a pin there.
Find the center of the skirt on either
side of the center pin, and pin to the under arm seams.
Now, gather the skirt
by pulling your thread. Even out the gathers, and place a pin about every
1/4".
This probably seems like a lot of pins, but it is worth it to take
the time to add the extra pins,
as it insures your gathers stay where you
want them.
Sew slowly, with the gathers down and the bodice on top. Sew with about a 1/4" seam or less. Trim seam when finished.
STEP SIX

The original dress has a very deep
hem. To make your hem, fold the skirt up about 1/8" of an inch and
press.
Then, fold up about 1/2". I say 'about' because this is actually
going to depend on your preferences,
and how exactly like the original
garment you want yours to be. Pin the hem up, and place the outfit on your
Hitty.
If you like the length, proceed. If it is too short or too long, adjust your hem accordingly. The original dress is quite short.
Tack down, trying not to allow the stitches to show too much on the front, although as you can see below, it does show on the original dress.
Once the hem is finished, it is time to sew up the back seam.
The original
dress has a center seam, but if you are afraid the outfit will not go on your
Hitty,
you might want to just hem the sides and leave it open. Otherwise--proceed by placing a pin about
1" down from the waist,
and another pin matching the hem. Sew this seam,
making sure to stay-stitch at beginning and end, as this has a tendency to
come unstitched.
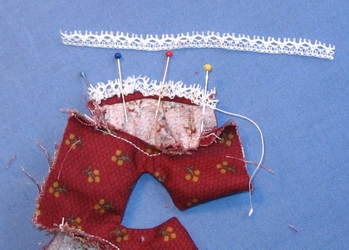
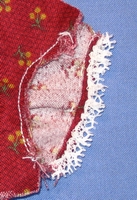
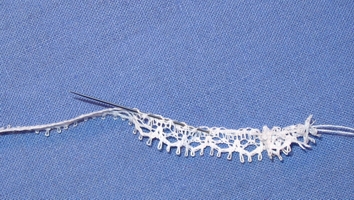
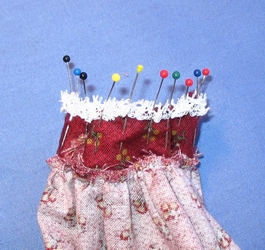
Next, cut the lace for the neck: 8"
Pin in place as shown below.
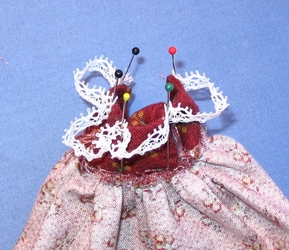
Note that the lace is not gathered yet. This allows us to place the gathers
more evenly.
Pin at the center front, the two back neck edges, and above the
arms first.
THEN gather by pulling your gathering thread.
Note: Make sure you have knotted both ends of your gathering thread so you
don't pull the wrong end
and pull it right out of the lace. (Not that an
expert sewer like myself has ever done that... )
Add a LOT of extra pins to hold the gathers in place. Sew on by hand.
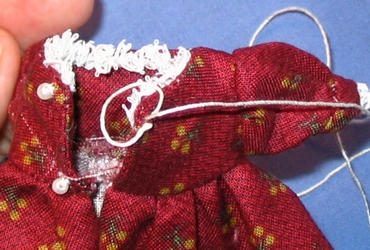
Finally, you will need to add the buttons. The buttons description says:
"The buttons are white pearl, rounded on the top, with a self-shank underneath through which a hole is drilled side to side for the thread..."
I was not able to find any like this, although I am sure I have seen them before, and will continue looking.
I used two 'pearl' beads this time. The loops are cotton thread. Knot the end of your thread,
and pull it into place. Make a loop, and anchor it with another knot.
This is hard to describe, but you should just use any method you might be familiar with.
There! You should now have re-created a lovely piece of Hitty's history.