
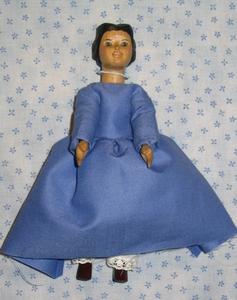
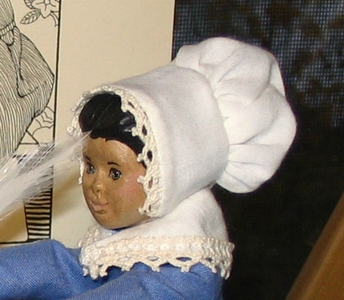
The Quaker Outfit
"...and the other was a pearl-gray silk, made in
true Quaker fashion, with a fine white fichu crossed in front, lawn cap, and
all..."
page 110, Hitty: Her First Hundred Years, by Rachel Field.
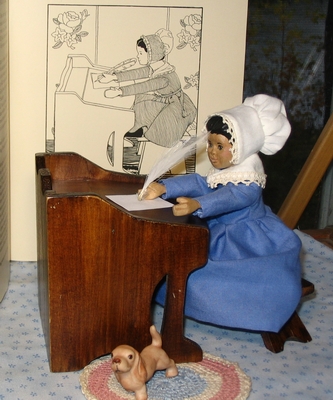
Hitty Petal at her desk, wearing the Quaker Outfit.
Supplies:
Sewing Machine
Needle and Thread
Scissors
Fabric for dress
Lawn or Batiste or other fine fabric for cap and scarf
lace
2 snaps
1 doll button
elastic thread for loop
Fray Check Product (optional)
No Sew product (optional)
Patterns:
Bodice
and Sleeve
Scarf
and Cap
The Dress
Step One
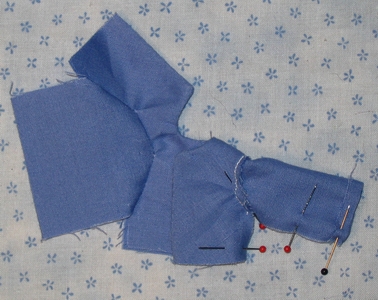
The Bodice
Cut out your pattern only--not the fabric. Using a
pencil, lightly trace around the pattern on
doubled fabric. You will sew on the dotted lines indicated on the pattern--up
the back,
around the neck, and down the back on the other side.
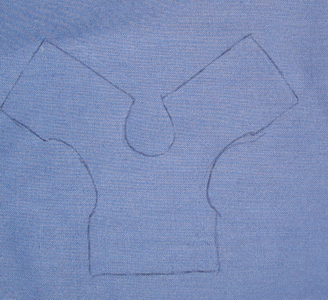
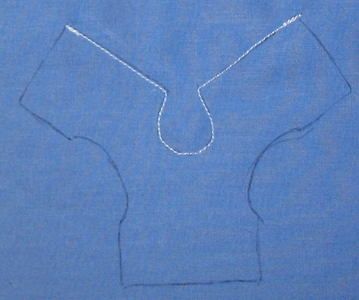
Cut out, leaving a 1/8th inch seam allowance around the sewn part. Clip the curved seams.
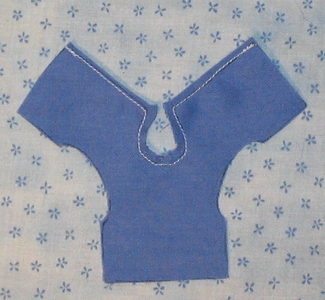
Turn right side out, and press. You may need to use a blunt
object, such as a hemostat to push out the neck corners.
Tip: never use scissors to push out corners. It
will always punch through the fabric, leaving a hole. No need to ask how I
know this.
Step Two
The Sleeves
First, fold the wrist edge of the sleeve up 1/4"
and press. You may hem this by machine or hand, or
do as I did--I used No Sew, a soft, fast-drying 'glue' that holds the seam
in place forever.
I bought it for $2.99 at JoAnn Fabrics.
The sleeves will fit right into the armhole, so merely
pin in place, and sew slowly around the seam. Once sewn, clip the seam down
evenly.
If your fabric is the type to fray easily, you may want to consider using
a Fray Check Product.
Once the sleeves are in place, Pin at the wrist, underarm seam, and bodice bottom seam, and sew the underarm seam.
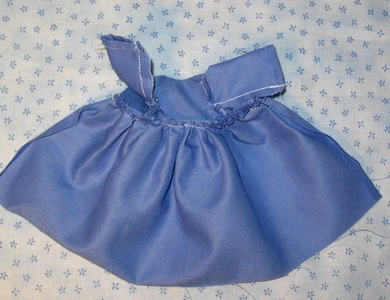
Step Three
The Skirt--cut 4" x 10"
With a running stitch, gather one long edge of the
skirt. Pin this in place as follows:
the center of the skirt should be pinned to the center of the bodice. Fold
over both short ends 1/4" and pin to the back bottom of the bodice.
Now, pull your running stitch to create gathers, and move the gathers evenly
across the bottom of the bodice.
Tip: place pins every 1/2" to ensure
no slippage of the fabric.
Sew so slowly, you can see your needle move up and down.
Sew with the gathers to the bottom, and the smooth bodice edge to the top.
Step Four
Turn the dress right side out, and try it on your
model. Figure out where you want the hem to be.
Once you have figured out the hem, fold it up and press.
You can hand-sew, machine-sew, or use a No Sew product to secure the hem.
Step Five
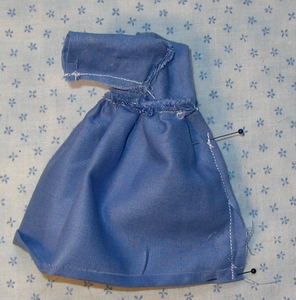
The last part is the back seam. See where the first pin is placed? This is
where
you will begin sewing. When you sewed the skirt to the bodice, you were supposed
to fold over 1/4".
This should remain folded over. As you go down the skirt, you can open this
fold (as shown).
Tip: double-stitch at hem and top to avoid having the seam come undone.
Step Six
Sew a button on one side of the bodice back, and make a loop from elastic
on the other side.
Or--you can always use a snap.
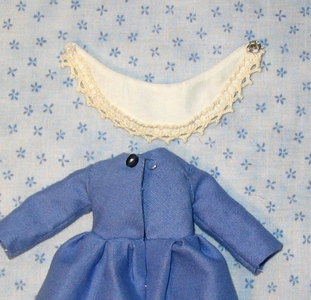
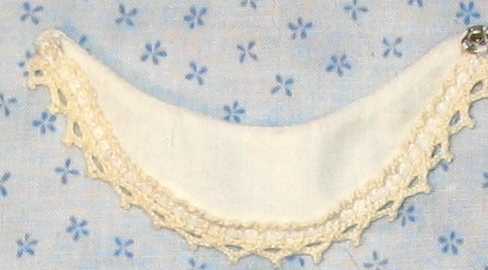
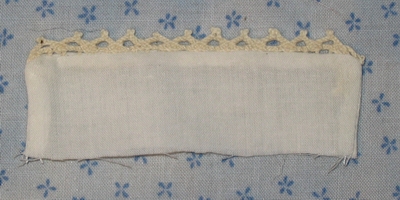
The Fichu
Cut out the scarf pattern. Trace onto doubled fabric.
Sew on the drawn line, leaving the space between the dots
open for turning.
Cut out, with a 1/8th inch seam. Turn right side out, and press.
Tack opening shut.
To add the lace, simply sew it around the outside edge by hand or
machine.
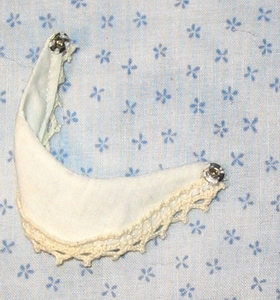
Add a snap, with the snap concealed. (You do this by sewing the snap
on the top part (as shown)
and on the under part of the other end.
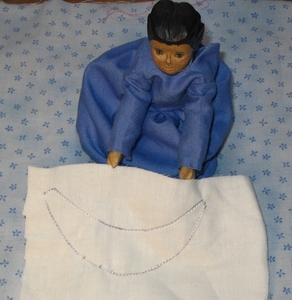
The Lawn Cap
Step One
Cut out the brim at 3 1/2" x 1 1/4" (cut
two) and layer as shown, with the lace in the center.
Pin securely, and sew up the short end, across the pinned part, and down the
other short end.
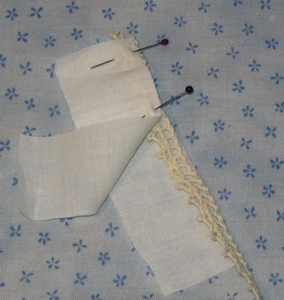
Turn right side out, and press.
Step Two
Cut out one bonnet piece. Where the rectangle part
sticks out, fold it over twice so the raw edge is concealed,
and then tack it down with a small running stitch.
Gather the round part of the bonnet with a running
stitch, but do not gather the square part you just hemmed.
Pin the brim as shown, to the bonnet. Note that you do not pin or sew the
brim over the hemmed part of the bonnet back.
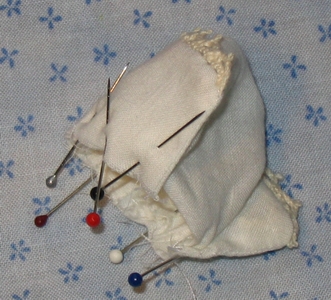
You can attach ribbon to tie this on, but I used a piece of plastic elastic (beading elastic) instead, as it just looked neater than a ribbon.
Have fun! Send
us pictures of your completed Quaker outfit, and visit
our gallery.