
Hitty's Craft Stick Lawn Furniture
© 2005 Julie G. DeGroat
All rights reserved. This Tutorial may be printed for personal use only. You
may not print and sell this Tutorial.
However, you may make and sell as many chairs as you can!
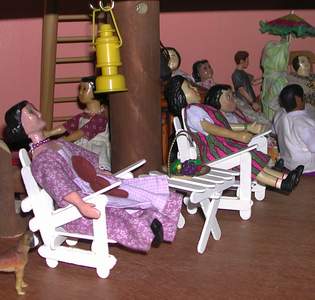
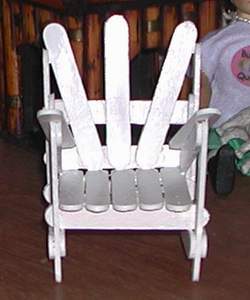
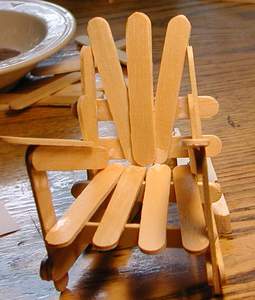
Hitty Minerva McGonnigal and Hitty Iris Raikes enjoy the new Lawn
Furniture at the Treehouse.
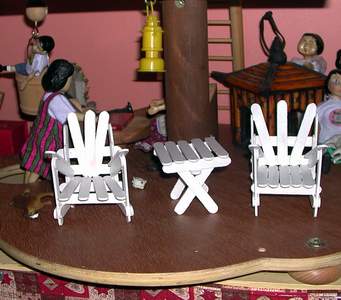
It's summertime, and the living is good! Make your Hittys these fast
and fun Lawnchairs to wile away the summer days.
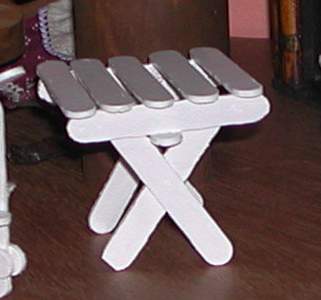
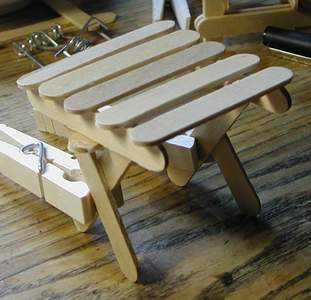
A sweet little table makes a nice place to set an icy glass of tea!
Supplies Needed: 37 Mini Craft Sticks (Both table and chair) Tacky Glue Paint or Varnish (as desired) 2 Spring-type Clothespins |
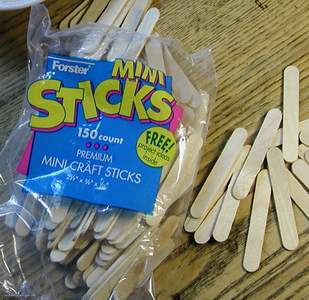 (I got them at Walmart for under $2.00) |
LAWNCHAIR
 .....
.....
#1................................................
#2
|
|
|
 |
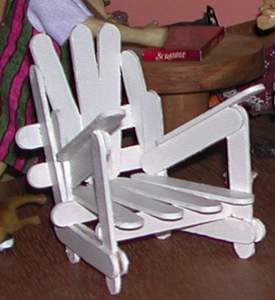
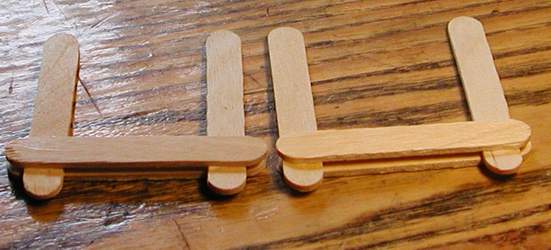
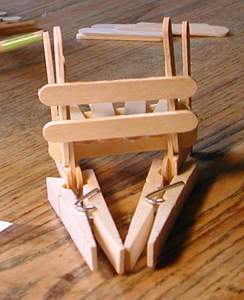
| 3. Take 2 craft sticks, and 'slant' them back from the two side posts, as shown. Let this dry completely before continuing. |
|
| 4. Glue two sticks onto the back of the chair. allow to dry completely. |
|
| 5. Glue the seat in as shown. I glue #1 in a 'fan' pattern, and #2 in a square pattern (straight back to front). The fan means that the craft sticks are further apart at the front of the chair. |
|
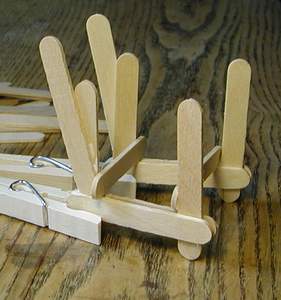
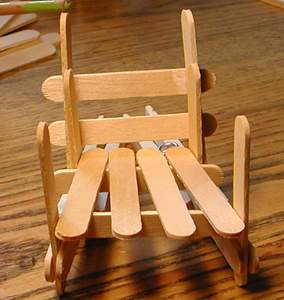
6. Glue the slanted arm supports in place, as shown. Allow to completely dry, and then glue the arm tops in place. (see next photo for the arm tops placement)
Allow to dry completely before continuing. |
|
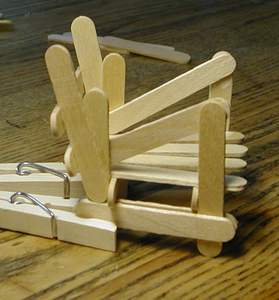
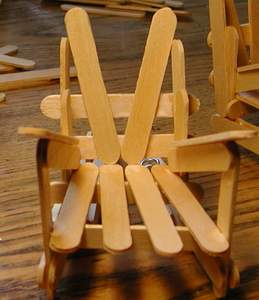
7. For the #1 chair, glue two back 'slats' on in a V shape. Allow to dry. #2-- glue three slats now, in a V shape. Allow to dry. |
|
8. For #1 only, add the third slat on top of the V slats. When the glue is TOTALLY dry, remove spring-type clothespins. Paint or stain as desired! |
|

TABLE
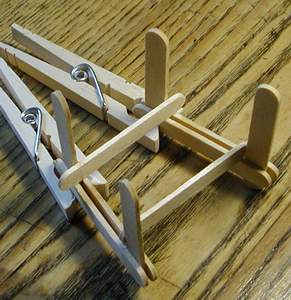
| 1. Glue the legs in an X shape. Make sure they are even! Allow to dry, and then glue a support across the top of both. Make sure that another support stick will be able to slip into the hole under the support for the next step. | 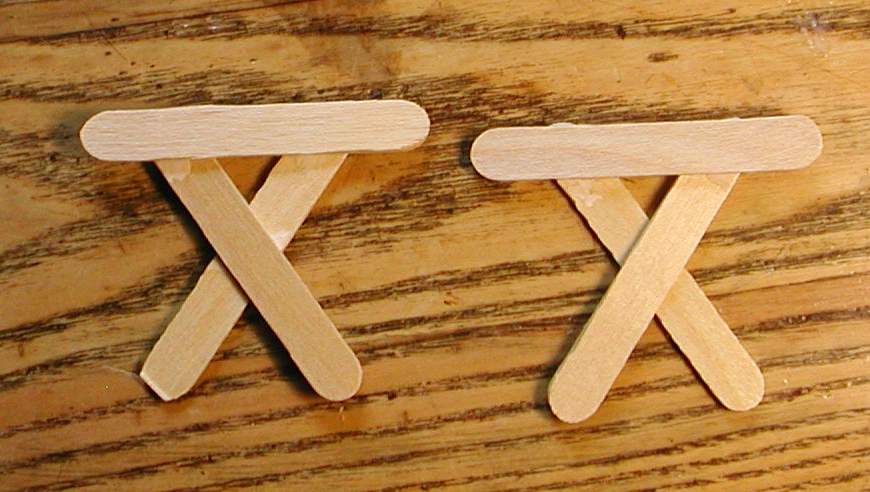 |
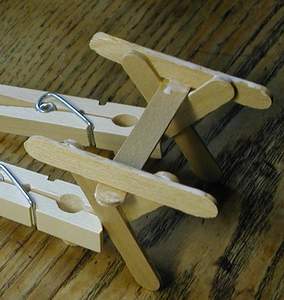
2. Clip a spring-type clothespin on the bottom of both legs for support. Make sure the side are held complelety upright, and do not lean in either direction. Glue a support stick in by sliding it into the hole under the supports in both sides. Allow to dry completely! |
 |
3. Glue 5 craft sticks across the top, spaced evenly. Paint or varnish as desired. |
 |