
Make a Mini-Lasagna/HotDish Holder for your Hittys!
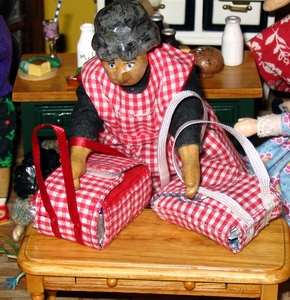
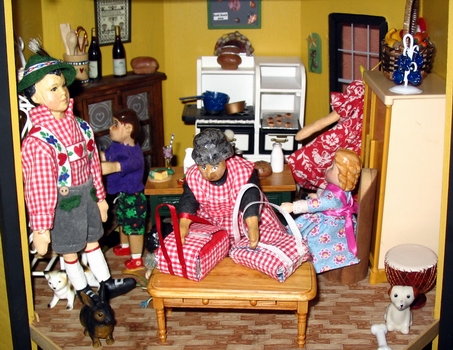
On the left is the original holder b D'Marie Ewing
and our version (small) on the right.
Mrs. Plum thought you might want two sizes.
And many thanks to D'Marie for allowing us
to make a pattern of her really great carrier.
Click Below for the Printable Patterns
Larger
Size
Smaller
Size
Materials Needed
2--7" x 7" (app.) of fabric--smaller
2--9" x 9" of fabric--larger
14" of ribbon for handle--smaller
17" of ribbon for handle--larger
snaps or velcro strip
Sewing Machine
Needles and Thread
Scissors
Pen
Step One
Trace your pattern onto the wrong side of one of your
squares.
This traced line is your sewing line.
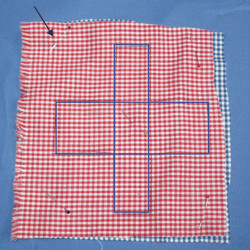
Then, place the fabrics right sides together, and
place pins on the four corners and center,
to hold the two fabrics together as you sew.
Sew all the way around, leaving a 1" gap on one of the sides so you
can turn the piece right side out.
Step Two
Cut out, and make sure to take a snip into the four inner corners.

Step Three
Turn right side out. With a blunt object, such as
a wooden turning dowel, push the corners out.
DO NOT use a pencil, pen, or scissors to push the corners out. You will go
right through
the fabric no matter how careful you are. No need to ask how I know this to
be true.
Press.
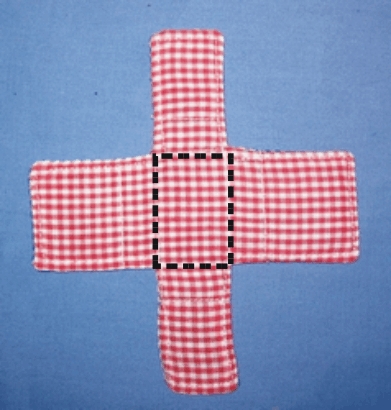
Sew a thin hem all the way around the outside of the holder (not shown)
Then, sew the square shown above in dotted black line.
This is the bottom of your holder.
Step Four
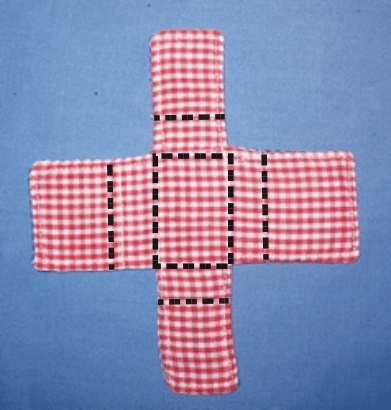
Sew the four outer lines, as shown.
Check your pattern for line placement.
Step Five
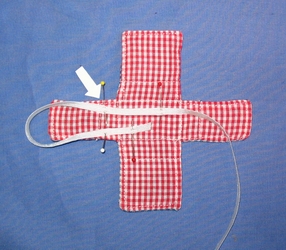
Place the ribbon on the piece, as shown.
The arrow shows how to pin the ribbon down
before sewing.
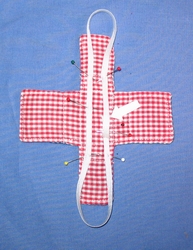
Overlap the ends of the ribbon.
Sew with a straight stitch.
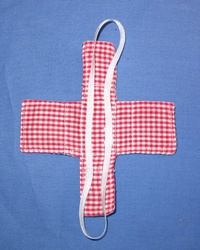
Finally, either add snaps
or a narrow velcro strip to the two
shorts ends, to hold the holder shut.
Tip: After I had the stitching all done,
I fold on the stitched edge,
and pressed with a hot iron.