Hitty's Heirloom Quilt
Our Version of the Original Hitty's Quilt
 Our Version |
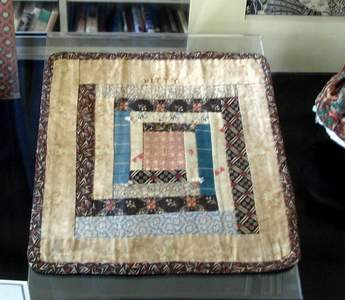 The Real Version |
Supplies List
Sewing Machine
Rotary cutter and Mat
Scissors
Iron and Ironing Mat
Magic Sizing or Spray Starch
Needle and Matching Thread
1--8 1/2" x 8 1/2" Backing Fabric
Red Embroidery Thread
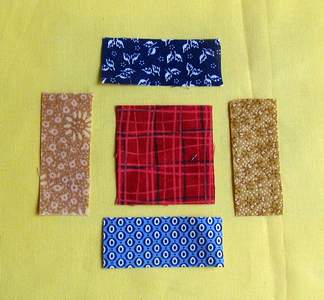
Cotton Scraps for the bars. The longest scrap is only 5", so they don't
need to be large.
All seams are 1/4"
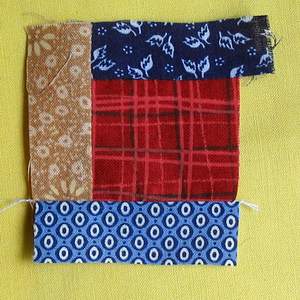
Step One
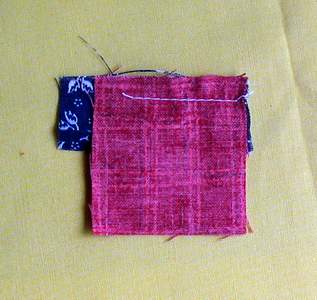
For this step, cut: 1--1 3/4" x 1 3/4" red square. Red symbolizes hearth
and home.
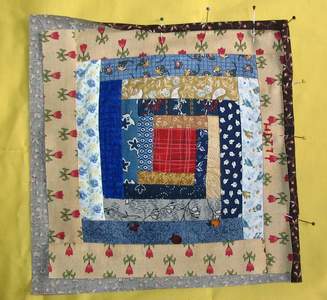
Starting at the top, sew the rectangle on as shown. You need to leave a 1/4" unsewn seam on this part only. To do this, measure in 1/4" from one edge, and make a small pencil mark. Sew from the pencil mark down to the end. This will leave an open piece at the top. Ignore that for now.
Spray lightly with Magic Sizing, and then press this rectangle up. When I say press, that's exactly what is needed here! Do NOT iron this small piece like you would a shirt, with back and forth motions. You need to lift the iron up and then press the iron down, without wiggling it on the fabric at all. When you are attempting to iron small pieces, the heat of the iron can distort the fabric, so you need to be careful with this. You can get some pressing tips on my quilting site.
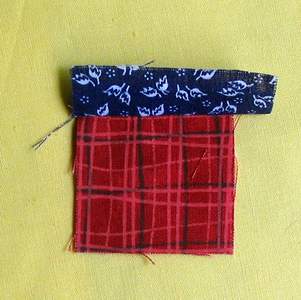
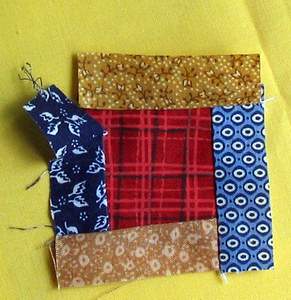
You will add the next rectangle to the left of this piece just created. Sew it straight on, with no open seams. Press.
Add the third rectangle across the bottom. Again, sew it right straight on. Press.
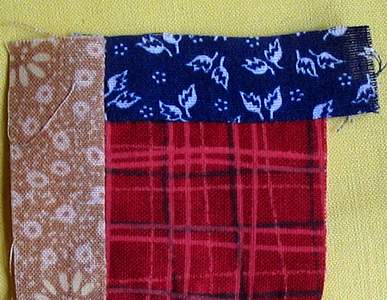
Now it's time to add the last part in this unit. Sew the this rectangle all the way straight across, making sure not to catch the first rectangle in your stitches. Press.
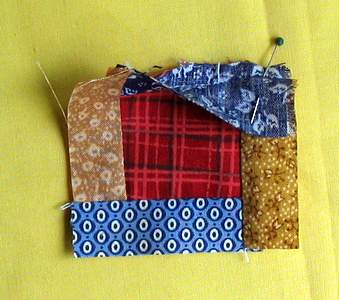
Flip the first rectangle over as shown below, and secure with a pin. Sew across that last little bit left unsewn, to the end. This may seem awkward at first, but keep at it--it is very easy to do! Press.
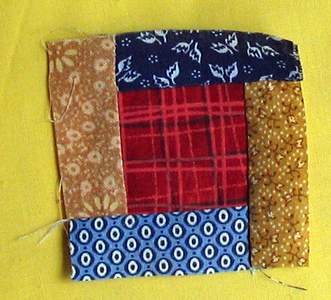
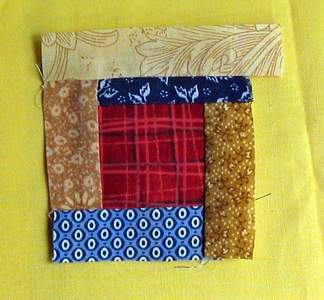
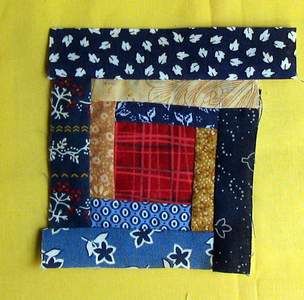
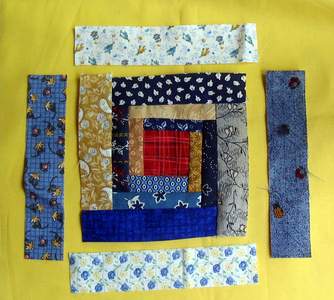
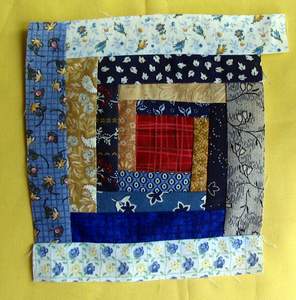
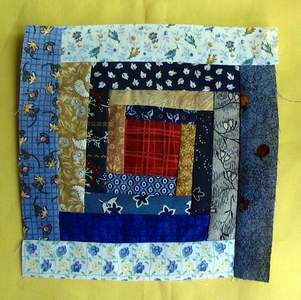
Note: If your edges don't match exactly, don't stress on it. It is not always easy to sew small pieces, because even the slightest variation in seam allowance can cause the bars to be different. I think this may be the reason some of the Original Hitty Quilt's bars are off-sized when they should be the same in each unit. Tip: Press after every single step using the Magic Sizing. The Magic Sizing makes the fabric lay quilt a bit flatter than mere pressing, and makes your fabrics fit together better before sewing. Step Two For this row, you will need to cut 4--7/8" x 3" rectangles, from 2 different lights and 2 different darks. Lay out as shown. All sewing directions are the same as in Step One. Make sure to mark the 1/4" and leave it open until the last row!!!
Follow the last row instructions in Step One--make sure to pin so your fabric doesn't slip!
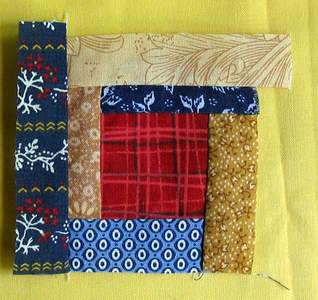
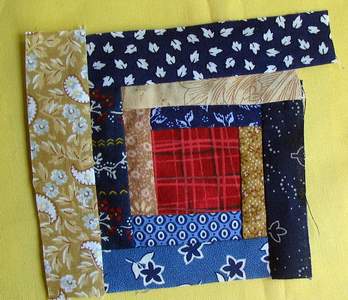
Step Three For this row, you will need to cut 4--1 1/8" x 4" rectangles, from 2 different lights and 2 different darks. Lay out as shown. All sewing directions are the same as in Step One. Make sure to mark the 1/4" and leave it open until the last row!!!
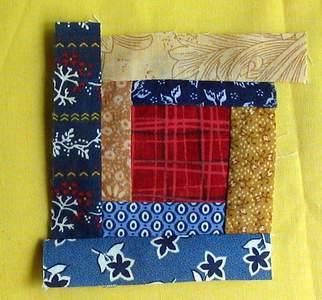
Step Four For this row, you will need to cut 4--1 1/8" x 5" rectangles, from 2 different lights and 2 different darks. Lay out as shown. All sewing directions are the same as in Step One. Make sure to mark the 1/4" and leave it open until the last row!!!
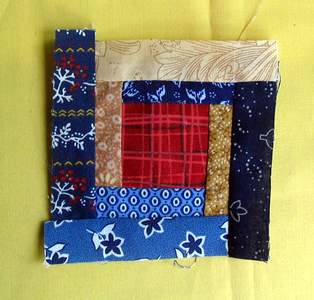
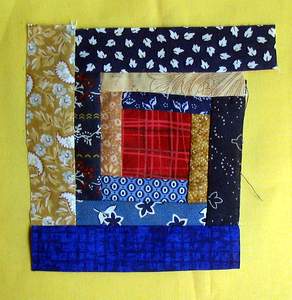
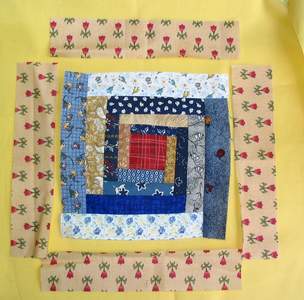
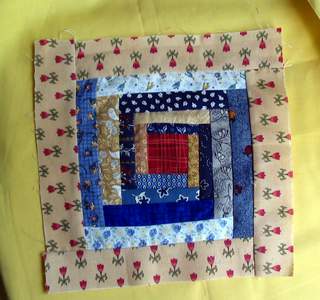
Step Five For this row, you will need to cut 4--1 1/2" x 7" rectangles, all the same. I would recommend a light. Lay out as shown. All sewing directions are the same as in Step One. Make sure to mark the 1/4" and leave it open until the last row!!!
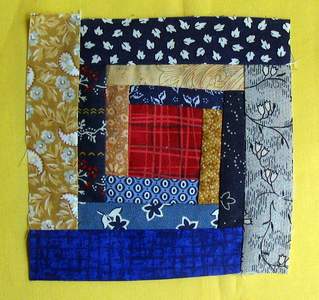
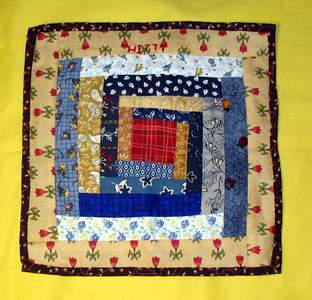
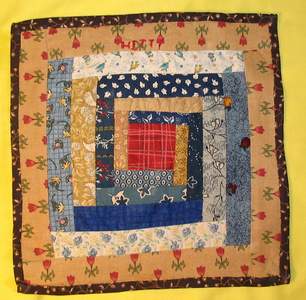
Step Six You should spray this quilt lightly with your Magic Sizing now, and press, press, press, to make it nice and flat. If you get uneven or ripply sides, try wetting it completely in warm water, drying it, and pressing again. If needed, trim the final results to 7 1/2" x 7 1/2". If you are not sure how to trim this, check out the how-to on my quilting site. Now, take your red embroidery thread. I sewed the word 'HITTY' on with three strands. I also free-handed it on, as it is all upper caps on the original quilt, and I thought it would be easy (which it was). If you are insecure about free-handing the name, just draw very lightly with a quilter's pencil that is removable. If you don't want to buy one just for this one project, use a regular pencil and draw the lines very lightly. The name is centered in the top bar of the Original Hitty Quilt. If you would prefer, you could always write your own Hitty's name in this space. If you go back and look at my finished quilt, you will see the word 'HITTY' didn't show up as much as I would have liked, because I chose too dark a fabric for my final row.
Step Seven Take the finished top and the 8 1/2" x 8 1/2" backing, and lay the down wrong sides (backs) together, as shown. Center the top over this backing. Then, fold the backing up and over to the front, folding the cut edge under about 1/8" (more or less, according to your tastes). Pin securely all the way around. Take your matching thread, and sew this edge down to the front of the quilt. You will note that there is no filler in this quilt. I elected not to include a filler, as it can make such a tiny quilt too stiff.
THERE! Almost done. Now, didn't I promise you this was easy?
Step Eight This last step is up to your discretion. If you like the bright, new colors in your quilt, stop here! If you would like to antique your quilt, continue. In a small saucepan, boil two cups of water and 10 tea bags. Different types of tea produce different shades. Black Pekoe produces a tan look, while Orange Pekoe produces a warmer tone. Experiment! Once the water is boiling, turn off the heat, and push the quilt under the water with a spoon. Let it set at least ten minutes, but sometimes I let it set until the water cools. Take the quilt from the water (use tongs if you didn't wait for it to cool) and rinse the quilt under running cool water until the water runs clean. You need to remove any excess tea. The quilt is going to look darker than the final version until dry. Once dry, press and you are all ready to play! If your quilt isn't as dark as you want, simply repeat the process.
|