
Baked Ham
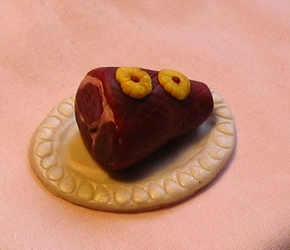
on a Platter
For this tutorial you will need:
Small amounts of clay in the following colors.
Dark Red--ham
White--ham fat
White translucent--for fat
Off-white--bone
Yellow--pineapple
Bright Red--cherries
Pearl--platter
Tools:
Knife or razor blade
Roller
dental tool for making holes, etc.
Circular cutter for pineapple
Round item for platter (I used the top of a bottle)
Paintbrush for gloss
Paintbrush for chalk
Begin:
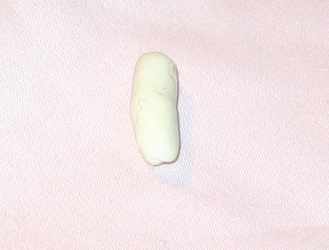
Roll the off-white for the bone into a tube, set aside.
Mix a large marble-sized piece of the white with the
same size piece of translucent.
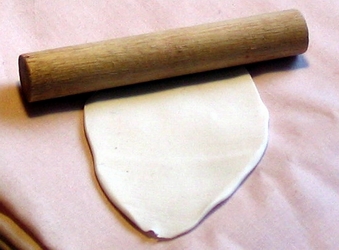
Roll out.
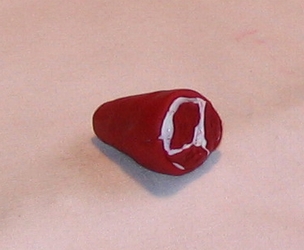
Take the dark red for the ham, and form into a shape about 1" high, and
about 1" across.
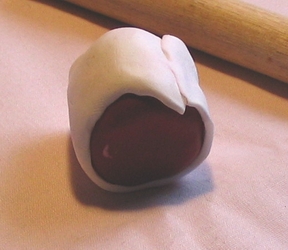
Wrap the white around the red, trimming the ends off the red evenly.
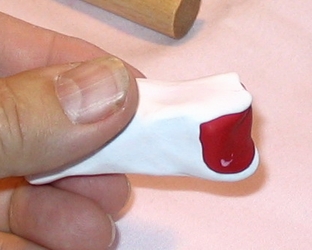
Squeeze and pull the clay between two fingers using both hands,
until it is 'about' as big around as the end of your thumb.
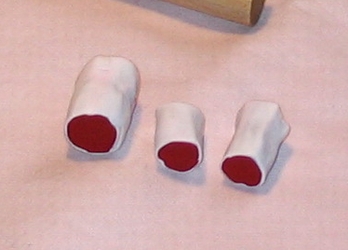
Cut off a piece about 1 1/2" long (about) and then pull/squeeze
the remaining piece.
Cut that so you have two smaller pieces.
Form the three pieces around the set-aside 'bone'.

Shape into a 'ham' shape.
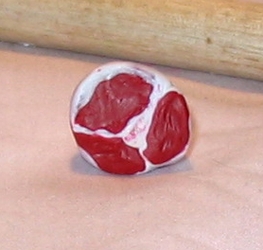
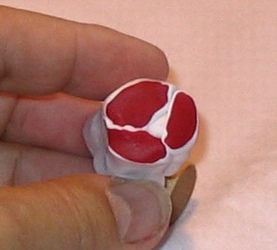
I used my dental took to make some 'meat' marks in the ham.
Also, you can push the fat in a little bit
Roll out another piece of the red.
Wrap it around your ham shape.
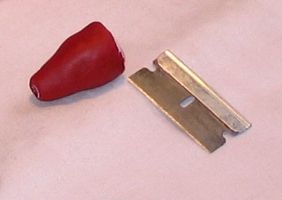
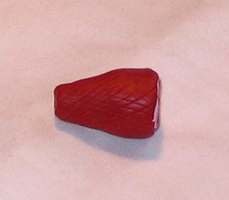
Finally, take the razor blade and make criss-cross marks in the 'skin'
so it looks like ham that was cured in the netting.
Brush dark brown chalk randomly over the red,
and put a little onto the front of the ham.
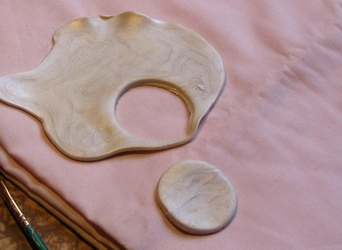
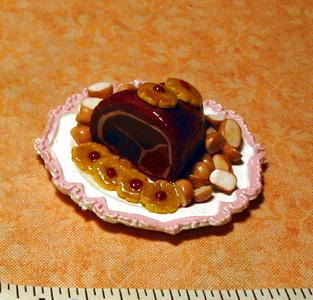
For the platter, roll out the pearl clay, and cut out a
circle for the platter. Pull the platter slightly to form an oval.
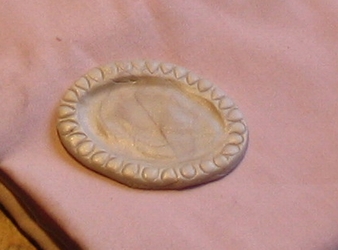
You can make any sort of decoration in the rim.
I used my tear-drop tool to make these.
You can also push down the center a bit.
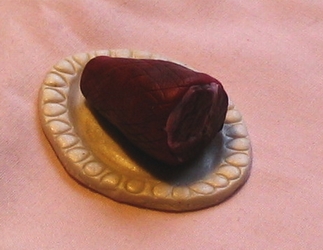
Place the ham onto the plate.
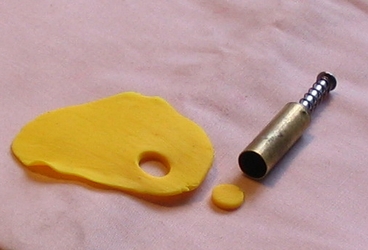
With your circle cutter, cut out two circles from the yellow.
Using the dental tool, make a small circle in the center of each one.
Place them on the ham. Then, using the dental tool,
lightly score across the pineapple slice. I like to push the
edges in a bit, too.
Add a tiny round 'cherry' from the bright red into
the
center of each slice.
Bake according to the clay directions on your package.
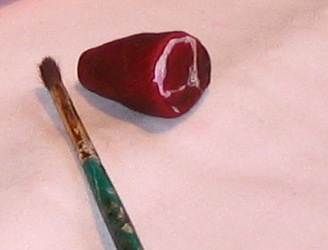
When done and cool, brush matte varnish onto the ham and everything else.
When that has dried, shine up the pineapple with glossy varnish.
*************************
Some fun additions could be potatoes and carrots,
or even a 'bed' of greens scattered with pineapple.
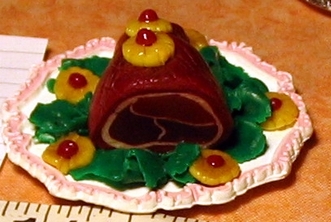
These are earlier hams, and as you can see, lack the center bone.
Have fun!
We did!