
October
10-14, 2013 Event Doll Dress
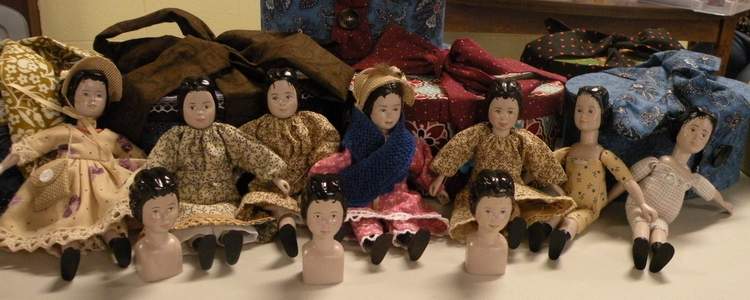
Created especially for the Resin Shoulderhead/arms/legs Event doll from
the
2013 North Country Hitty Retreat: Welcome to Hitty's
World
©2013 Julie G DeGroat
Get the Patterns by Clicking HERE
You will need:
Dress Fabric: 13" x 5 1/4"
Belt: 1" x 4"
Pants Fabric: 8" x 4"
Beading Elastic for neck, arms, and waist
Darning Needle
1 Snap
Needle and Thread
Sewing Machine
Scissors
Hemostat--not required, but it makes your job a lot easier!
Let's Begin!
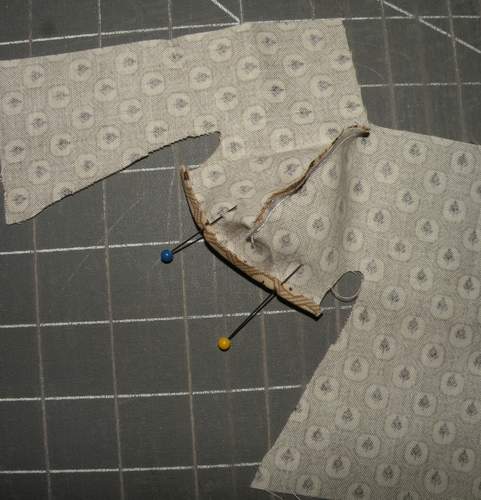
Fold your fabric in half as shown below.
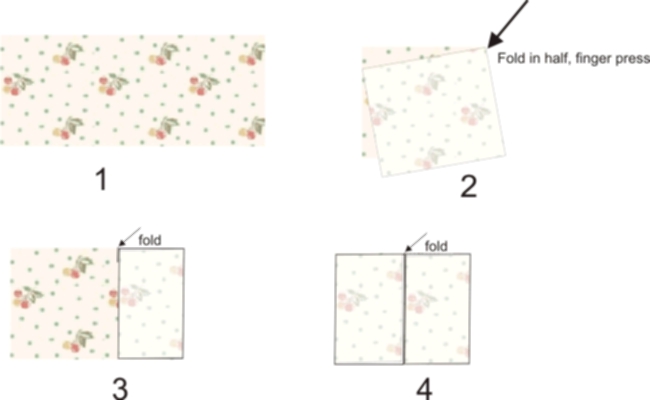
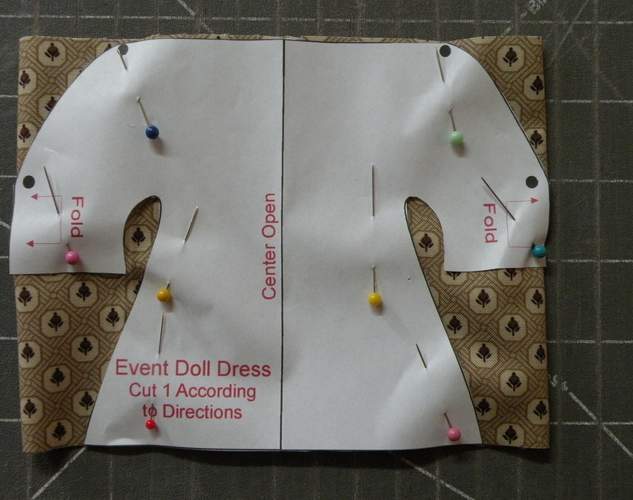
The edges of the sleeves marked 'Fold' will be on the folded part of the fabric, as shown.
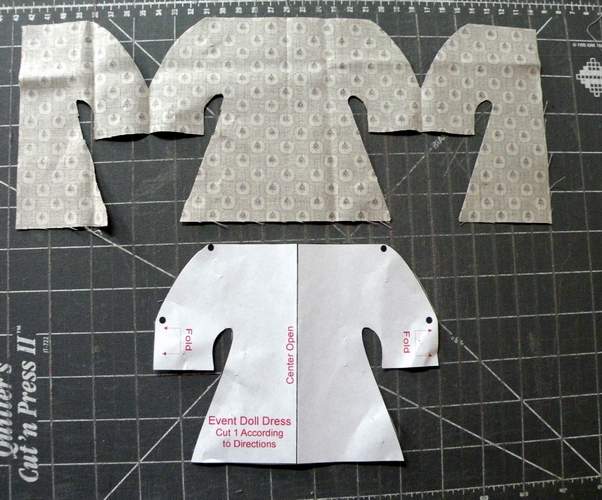
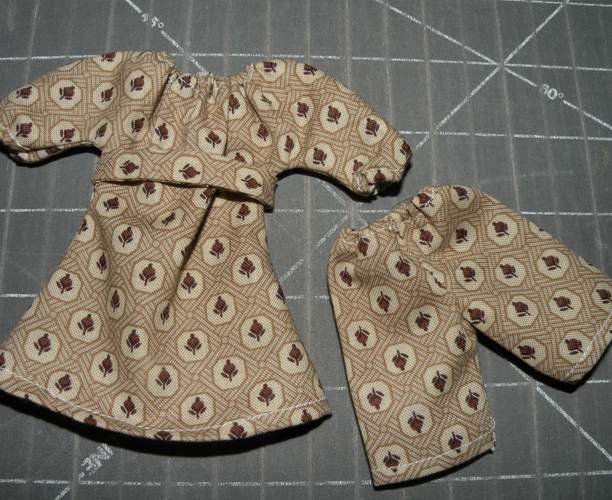
Carefully cut out the pattern. It should look like this when you are finished.
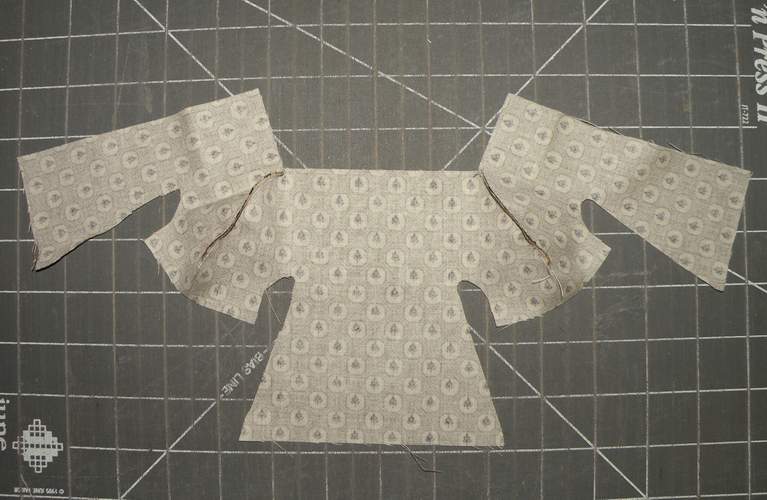
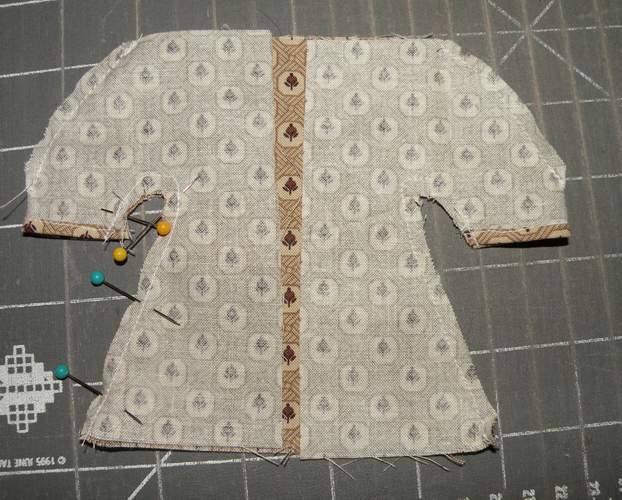
Next, sew both curved shoulder seams.
Fold the sleeve up 'about' 1/8", press, fold up again, press. Then, pin and sew.
Tip: By 'press' I mean lift the iron up, press it down. Never rub the iron back and forth like
you would iron a tablecloth--it can sometimes distort small items!
Once the sleeve hems are sewn, pin and sew both underarm seams.
(You should not have the gap in the center as shown above--I had a limited amount of fabric.)
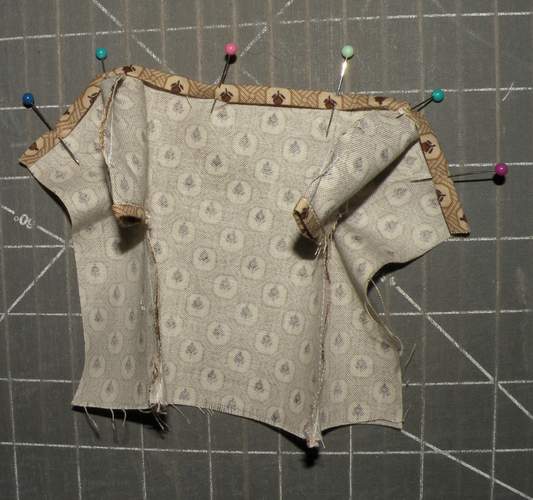
Fold over the neck seam 1/8", press, fold over again *about* a scant 1/4". Press, pin and sew across.
This creates the casing for the elastic neck.
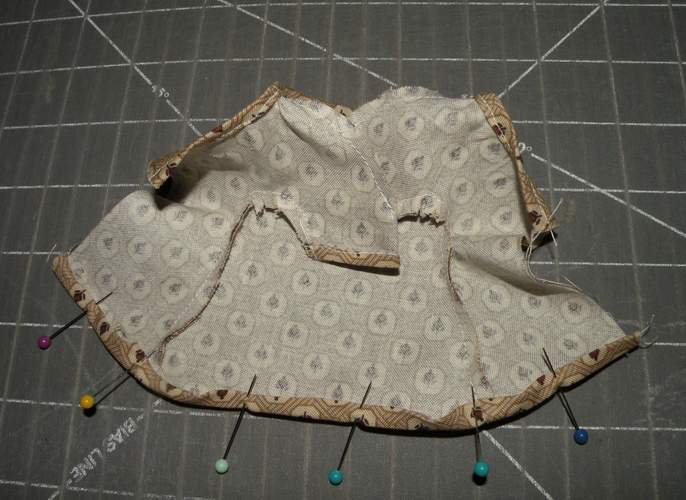
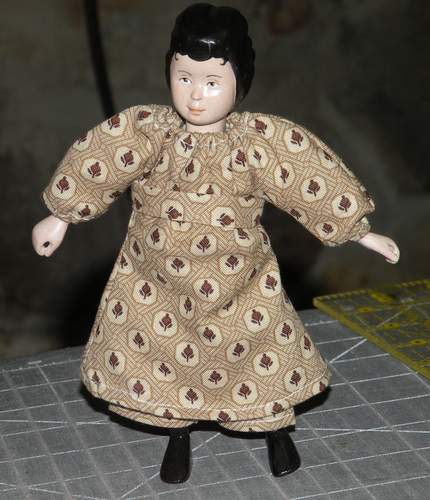
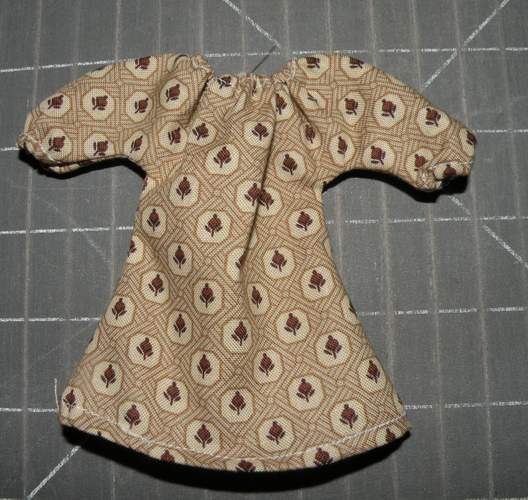
Repeat these steps for the hem. This dress was designed to be shorter than usual for Hitty,
so that her pants peek out from under it in a sassy way. You can make it longer by only
pressing your hem up 1/8th inch both times, or by adding lace.
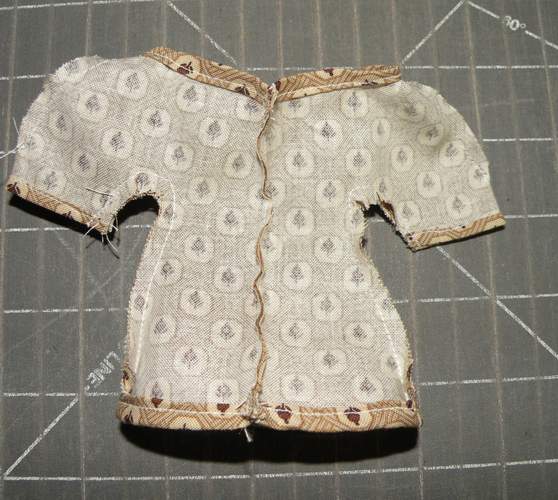
Once this is finished, sew up your back seam.
Using the beading elastic and darning needle, insert the elastic through the neck casing
and sleeve casings, and tie off. When I do a sleeve, I like to insert a pencil
into the sleeve, so it doesn't get tied off too tightly.
Belt
Put the dress on your doll, and then take the belt (1" x 4") and wrap it
around the waist. You may need to trim off some of the length. It
should overlap enough to add a snap.
Use a scant 1/8" seam allowance here.
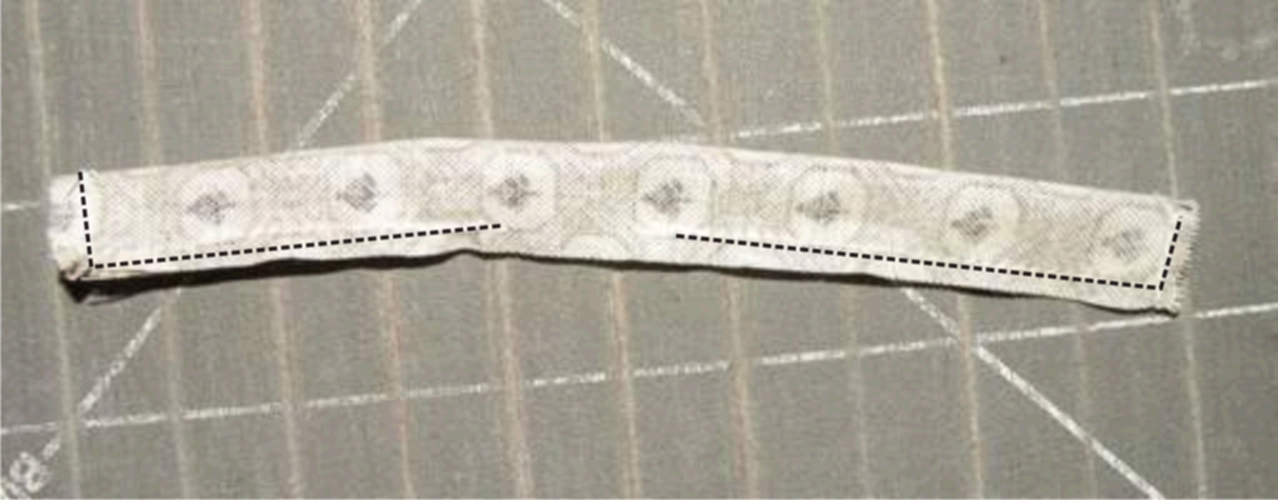
Once you have the proper length, fold the fabric in half as shown. Sewn across the end,
up the side to the middle, lift your needle, move forward about 1/2", and sew to the corner,
then across the end, as shown above. You will use the hole in the center to turn the belt
right side out. This is where that hemostat comes in very handy! Tack the opening shut
and press firmly.
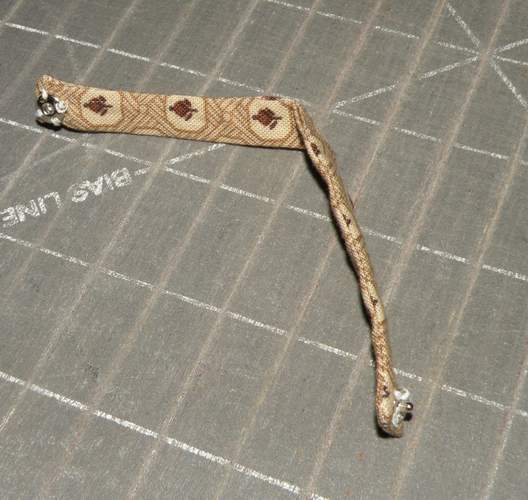
Sew the snap on as shown--on one end first, and then flip the belt and
sew it on the other end, opposite side.
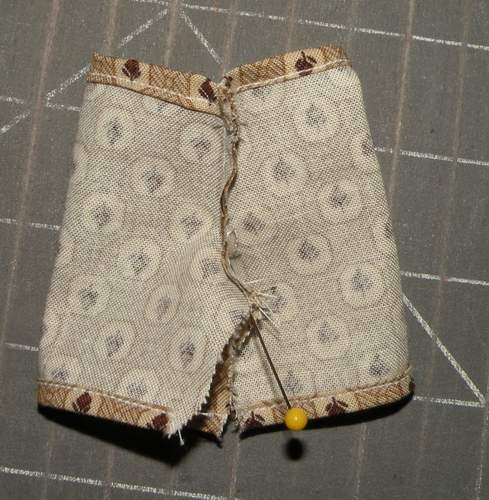
Pants
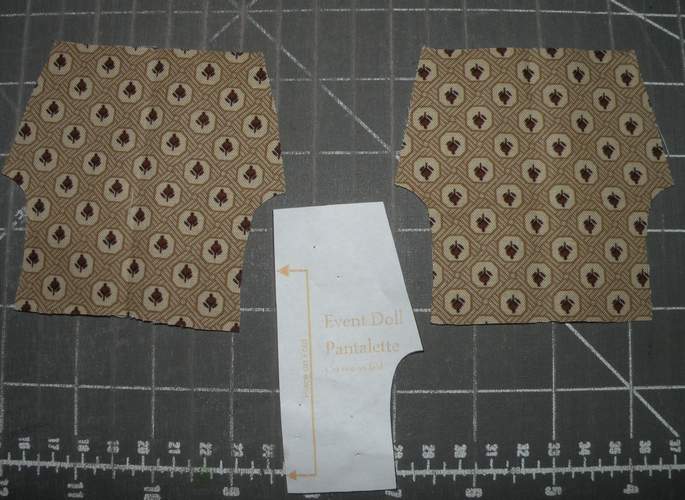
Cut out your pattern pieces. If you are using directional fabric, make sure you cut out
your pattern with the directional pieces facing the same direction. No need to ask
how I know we should do this. Just glance up at this picture!
I didn't have much of this fabric left, so I couldn't cut another piece.
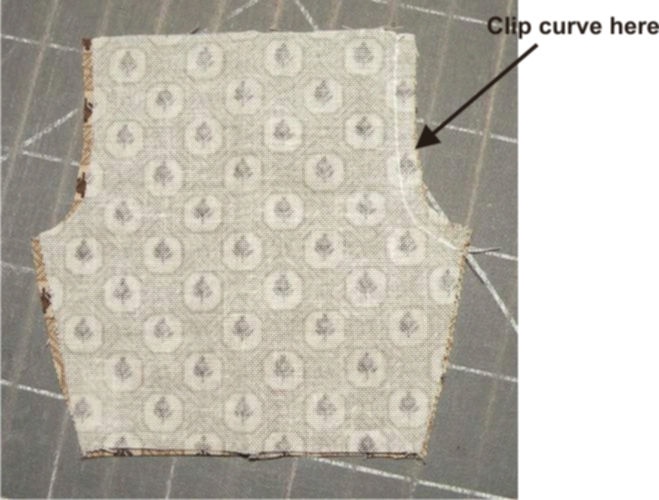
Sew ONE curved inseam. Clip the curve to help it turn properly.
Do NOT sew the other side yet.
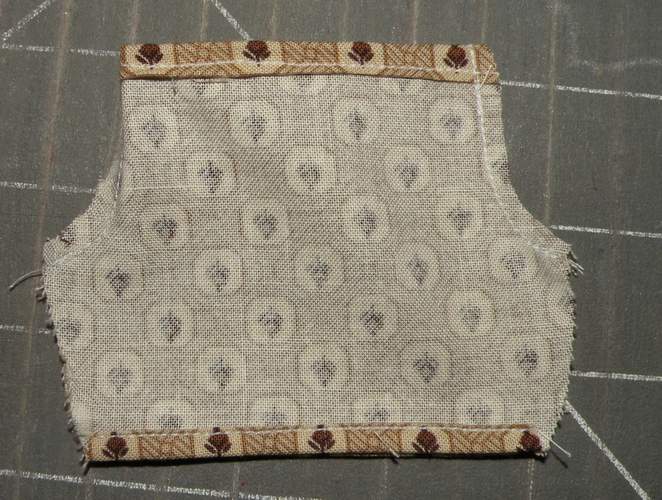
Fold the waist up 1/8" , press, and fold it up *about* 1/4" for the waist casing.
Press, pin and sew across.
For each leg hem, fold up 1/8", press, fold up another 1/8", press, pin and sew.
Now sew up the other curved inseam, and remember to clip those curves too.
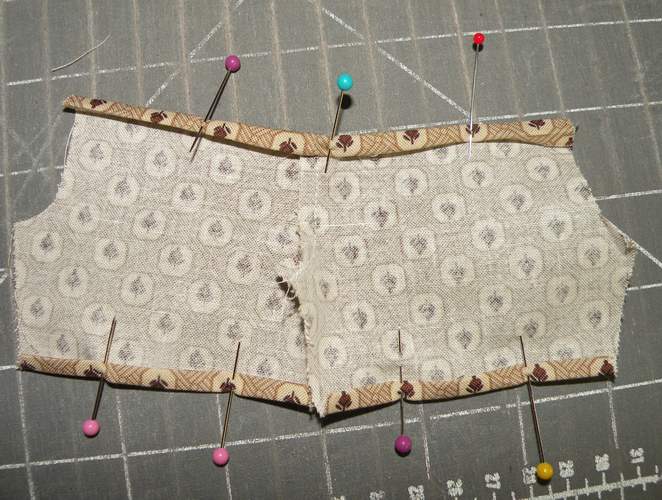
'Open' the pants so that the inseam is centered. They should look like pants now.
Pin in the center of the inseam, and pin both ends. Sew up, pivot on needle, and sew down.
Clip the inseam so it doesn't bunch when you turn it right side out.

Add the waist elastic and done!