Make a Fimo Clay Bowl and Basket for your Mini Dolls
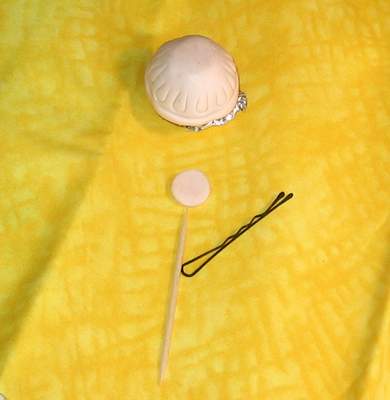
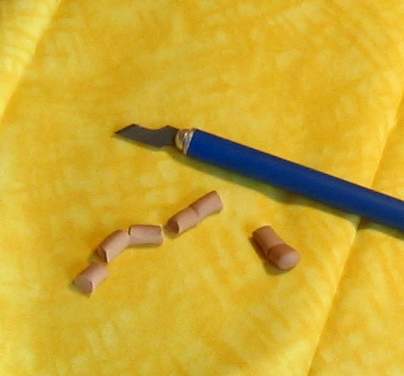
For these projects you will need a small amount of Fimo Clay (or
your favorite hardening clay)
Toothpick, thread, 'large' wooden bead, bobby pin (or other small item with
a rounded edge.), varnish (optional) and aluminum foil.
Always bake this clay according to the directions you have on your
package.
This can create hazardous fumes, so have plenty of ventilation.
NEVER use a dish for baking clay and then reuse it to cook food!
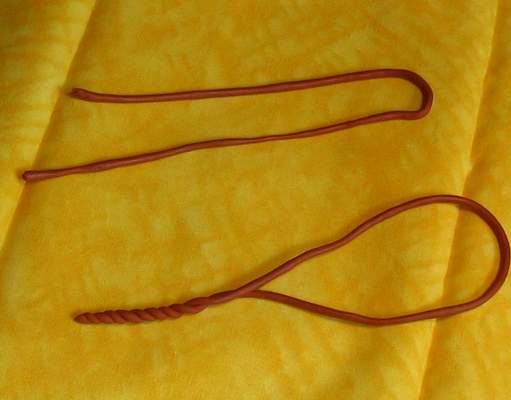
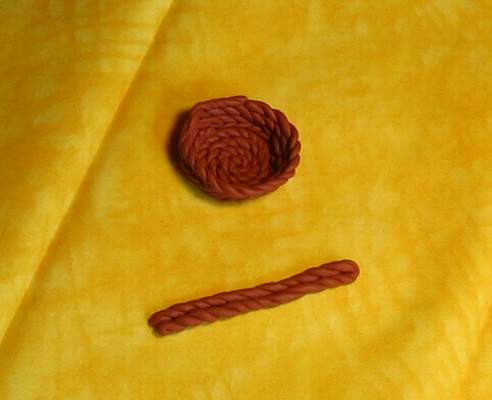
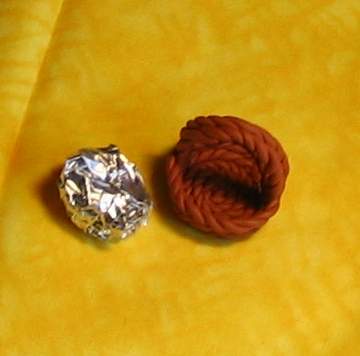
The Basket-- First, make a long (about a foot) strand of clay about 1/8th thick. Twist together as shown. |
|
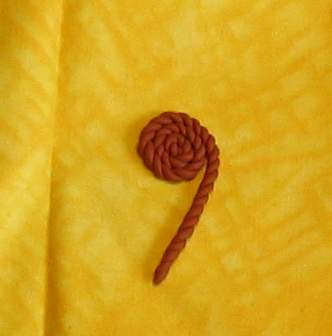
Next, coil the strand around to form the base of your basket. If you have too much clay, it's ok to cut some off. If not enough, roll it out again, adding a bit more clay, twisting as shown in step one. To make an oval basket, simply coil into an oval. |
|
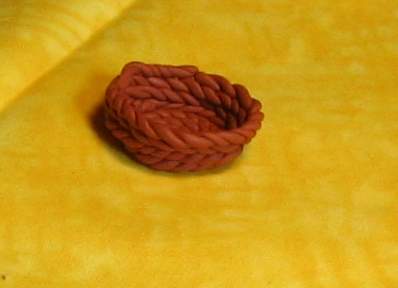
| Take another length of 1/8th inch thick 'rope' twisted as in the first step, and coil it around the base to form the sides. You can push the sides very carefully into the base with the toothpick, if needed. Go as high as you want your basket to be. |
|
| For the handle, take a third piece of twisted clay (made like step one), double it, and press very gently together. |
|
| Push the handle carefully onto the basket. |
|
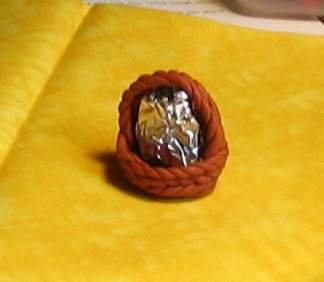
Wad a small piece of aluminum foil into a ball, and use it to support the handle as the basket bakes. When baked according to your clay directions, add any painted decorations or simply brush on a small amount of varnish for a lovely shine. |
|
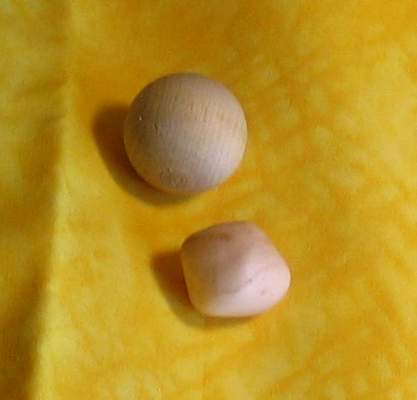
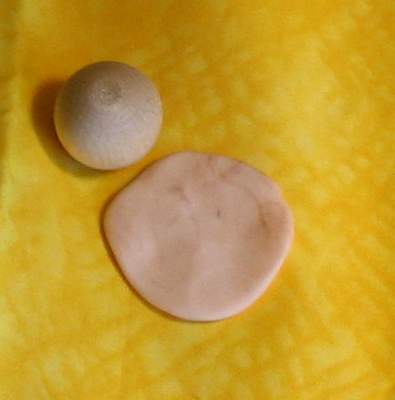
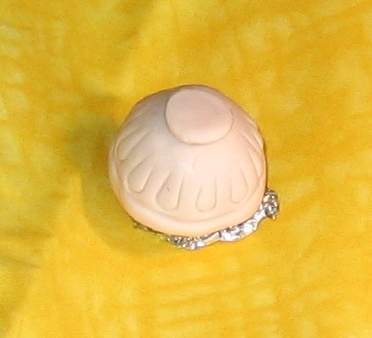
The Bowl-- The size of your bowl depends on the size of your wooden bead. Here I chose a wooden bead about 1" in size. Make a ball of clay slightly smaller than the bead you chose. |
|
| Flatten the ball. |
|
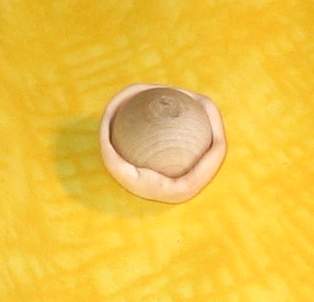
| Very carefully, pat it around the bead, leaving a space at the top. Don't worry about the uneven edges, as this will get fixed in the next step. |
|
| Carefully put the string around the top edge of the clay, in an even line. Pull tight slowly, and the uneven top edge will come off. With the toothpick, smooth out the top edge. | 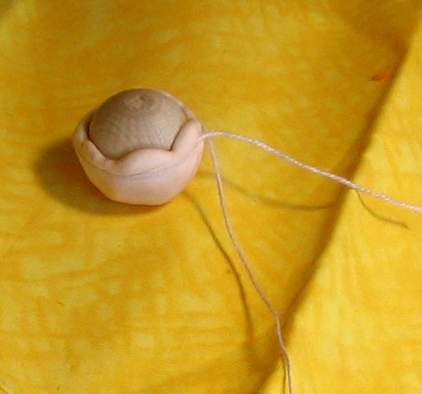 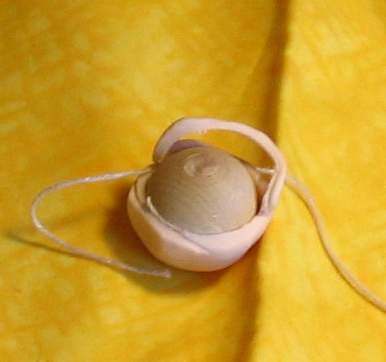 |
Take a piece of aluminum foil and make a 'base' to hold the bead so it doesn't roll during the next steps, and during baking. Make a very small ball of clay and flatten it for the base of the bowl. Put this on the bottom of the bowl. With your bobby pin or other rounded object (a paperclip would work) carefully press a design around the bowl. I also made an 'edge' around the top of the bowl with the toothpick. When baked according to your clay directions, add any painted decorations or simply brush on a small amount of varnish for a lovely shine. This bowl could be painted with designs, too! |
  |
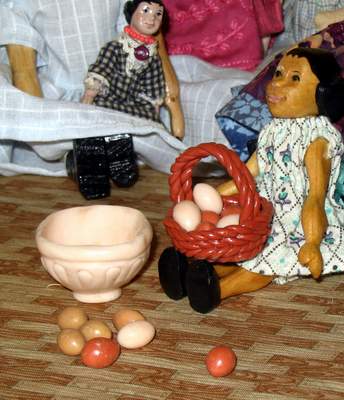
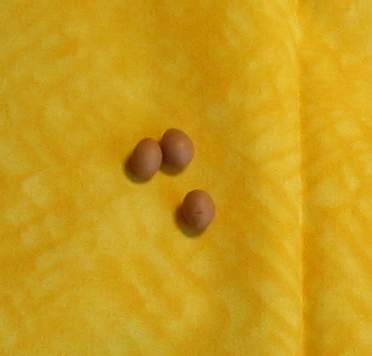
And finally, the eggs! Roll out a small amount of clay in natural egg colors. Cut into 1/3 of an inch size, more or less. If you roll these between your palms you will get a nice egg shape. Bake according to the directions on the package of clay you are using. When cool, you can brush on a small amount of varnish for a nice shine, or leave as-is for a more realistic egg look. I like to make these in varying shades of tan, to look like farm-fresh brown eggs! |
  |