
Christmas Square in a Square Quilt
This quilt measures 5" x 5", but can easily
be made larger by
adding another row of squares, or more borders.
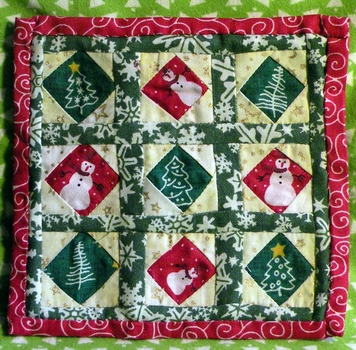
Fussycut your way to showcase special fabrics.
Supplies:
Sewing Machine
Thread
Scissors
Needle
Straight Pins
Cutting Mat, Cutting ruler, and Rotary Cutter
Iron and Ironing mat
Magic Sizing (about $.99, similar to but better than spray starch)
Measuring tape or ruler
Fabric requirements:
Enough special fabric to get 9-1 1/2" x 1 1/2" squares
36--1" x 1" corner squares
3/4" strips for sashing
3/4" strips for outer border
about 7" x 7" backing
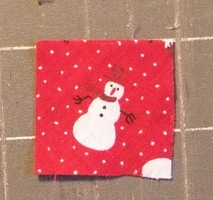
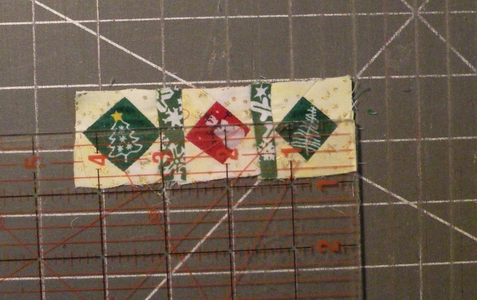
Find a fabric that will allow you to fussycut a square.
Since this quilt features 1 1/2" blocks, you need to place your ruler
so that the
picture on the fabric is centered to the best of your ability.
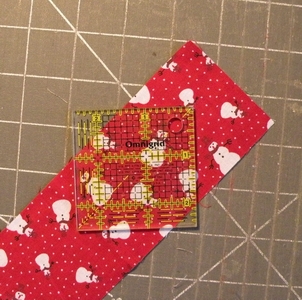
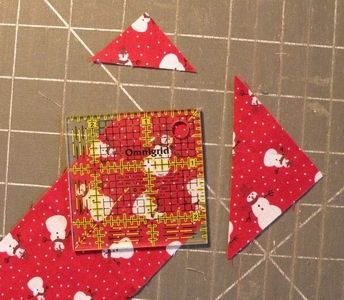
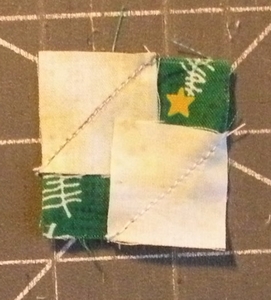
Once you have centered your picture in the 1 1/2" x 1 1/2" square,
cut off the two outer corners.
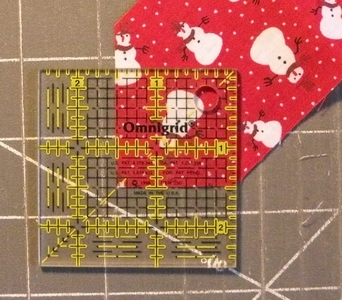
Flip fabric around, placing your ruler once again on the 1 1/2" x 1
1/2" measurement (first picture)
and cut off the two remaining corners.
This is a sew and flip method. If you are not familiar with this
method, I suggest
you take all of the corner squares and draw a line from corner to
corner.
This will be your sewing line. If you are experienced in this, and have
a line
on your sewing machine to follow, skip drawing the line.
Can you freesew this (don't draw the line)? Probably--it is pretty
small.
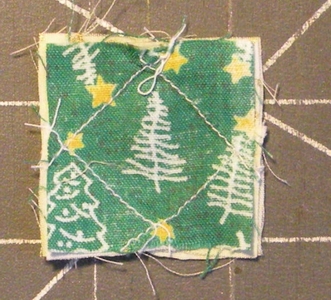
Sew on two opposite corners. flip the fabric to the back, and press.
When I say 'press' I mean 'press'! If you attempt to iron this
in a back and forth motion, it will distort your blocks terribly.
Even an experienced sewer like myself, pressing and not ironing,
gets some distortion. (see pic above)
Tip: Before pressing, spray block lightly with the Magic Sizing.
This makes
the seams lay very flat.
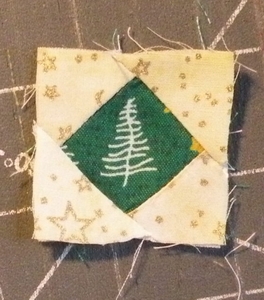
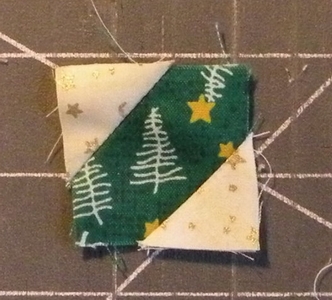
Sew on the remaining corners. Press carefully.
Now, flip your block over. See the extra fabric from the front?
This is normal. Simply square up your block, using the original
square as your size.
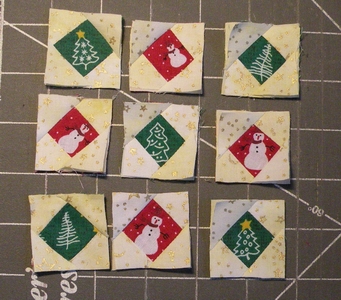
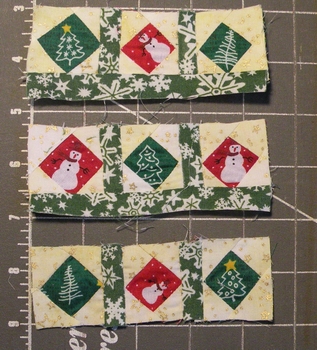
Repeat these steps for all nine squares. Once done, lay them
out in a pattern that pleases you.
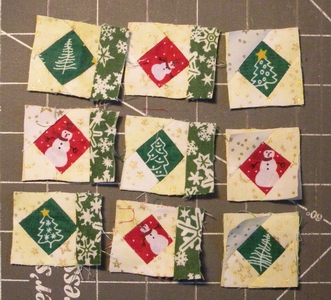
Since you have cut your blocks down to the right size,
you know that the inner sashing strips need to be that length.
In other words, if you trimmed your blocks back to 1 1/2" x 1/2",
then the inner sashing strip needs to be 3/4" x 1 1/2".
Sew the strips on as shown above.
Repeat until you have three rows, as shown.
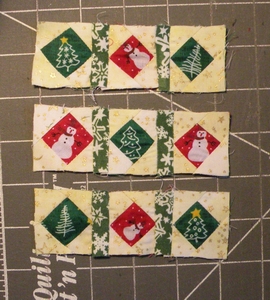
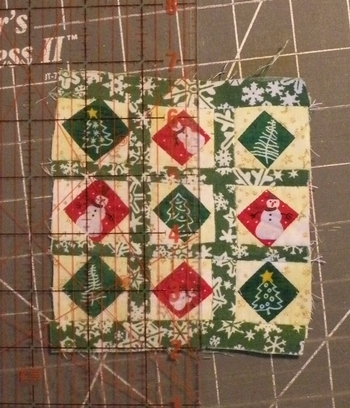
Now, to find the length of the long inner sashing strips, measure your
shortest row.
This is going to be the length for all of these strips. You need to
ease the longer strips
to these smaller strips. The best way to do this is to pin the two ends
together, and then pin
down the sides. The smaller length. (whether the strip or the row) is
sewn on top, because the top
fabric on your machine will tend to stretch just the slightest bit.
Cut the strips, and sew on as shown.
Remember to continue pressing through these steps.
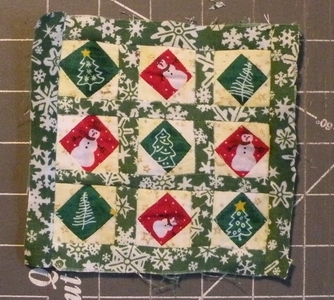
Cut two more strips at this length, and sew them to the top and bottom
of the quilt (shown below).
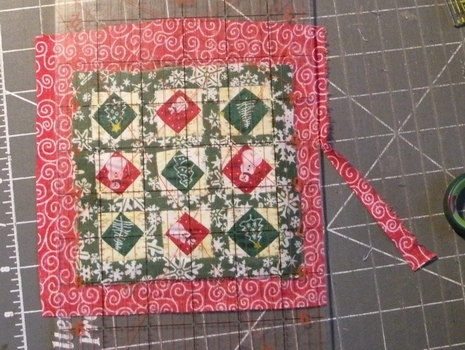
Now it is time for the two side borders. Measure your quilt
through the center, top to bottom, as shown above. This is the
length your quilt border sides will be. They will be 3/4" wide, by
your measurement.
Tip: never sew on borders by just holding up a long strip,
sewing,
and cutting off the extra. This method practically guarantees your
quilt will
have uneven sides.
Once the borders are all on, spray with the magic sizing, and press
(not iron) as
flat as possible.
Lay your backing wrong side up. Center your quilt top on this backing.
Now,
as shown in the photo, measure out 3/4" and cut off extra. make sure
that you do not shift the top
on the backing, so it is all even around.
Tip: if you have a revolving cutting mat, this make the job way
easier!

Fold and finger press the backing up to the edge of the quilt,
and then fold and fingerpress it onto the top. Pin securely.
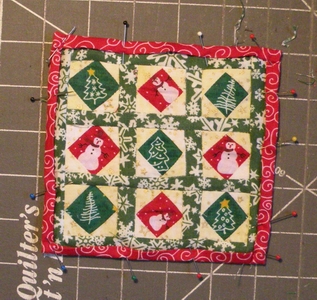
Pin all the way around, to make sure you won't have any slippage of the
top.
I like to sew mine by hand, but you can sew this by machine if you want.
There! Now you have made your own Christmas Square in a
Square quilt.
If you need it to be bigger, the best way is to add more center squares.
Tip: want your quilt to drape over the bed better? Simply spray
with
Magic Sizing and either press the sides down with your fingers, or use
an iron
to press them over.