Lorinda's Button Dolls
Lorinda T. has kindly agreed to provide this tutorial, and her own hand-made Button Dolls for Camp Week, 2005.
ENJOY!

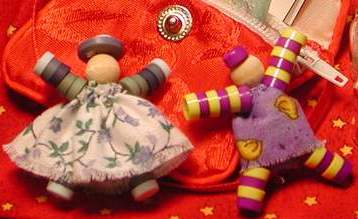
Photo 1
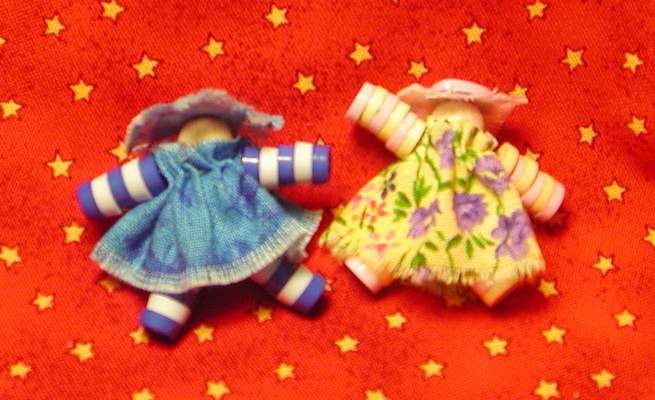
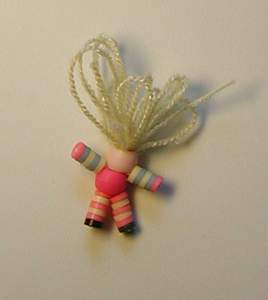
Photo 2
Lorinda's Tips: You can make the doll with either pink pony beads for the head and body (Photo 1) or small wooden beads (Photo 2). Use light pink buttons for the hands, and think of the bottom buttons of the feet as shoes. If you use larger buttons on the feet, the little dolly could stand. These dolls look good with either hair (photo 1) or hats. These hats were made from a circle of fabric and a larger button. If you makea hat, try using a fun button!
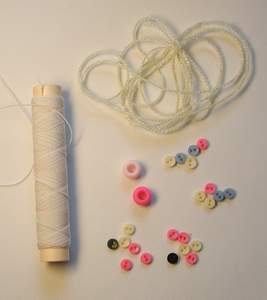
Supply List Elastic Thread
|
| 1. Start at the bottom. Thread the needle up through the body and head, around either the 'hair' or up through the hat button, and back down, coming out the bottom of the body bead. Push the needle through your starting knot, and pull it firm. | 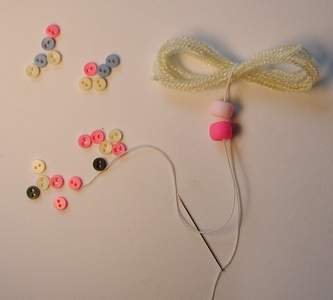 |
2. Thread the first leg onto the needle, going down through all six, and then right back up through the other buttonhole. Keep going up through the body, but not through the head. Thread on the five buttons for the first arm. Go back down through the body, and attach the second leg by threading down through the six buttons, and right back up through the other button hole. Continue right on up through the body but not the head. |
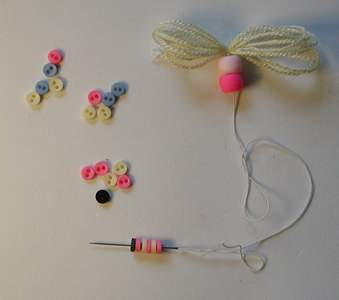 |
3. Attach the second arm by threading through the five arm buttons, then back through the other button hole. (Ed note: I found it helpful to go down through the body before continuing, wrap once around the leg elastic, and then back up through the body.) Go up through the head, and secure hair/hat one more time. Go back through the body, and knot off at the leg tops. Lorinda's tip: Put a dot of glue on the knot to make sure it doesn't come undone. |
 |
4. Trim hair or hat to fit. Add a face if desired.
You can now either add a ribbon to the neck or little dresses. |
 |
5. To make the dresses: Take the tiny dress scrap, and fray one long side (for trim). Sew the short ends together. Gather the unfrayed edge with a running stitch, slip the dress on the doll, and gather it tightly under the arms. Trim if needed.
|
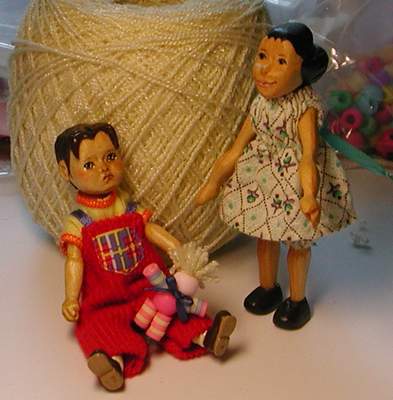 Bitty Boy Bobby and Bitty Aqua play with the button doll. |