
|
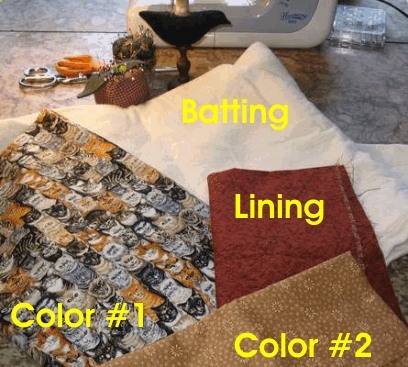
Supplies Needed: Lining: 32" x 16" Thread that matches your lining.
|
General Supplies: |
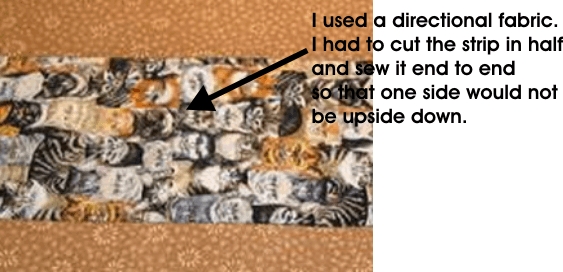
I selected a directional cat fabric for my bag. If you plan to
use a directional (the print goes in one direction) fabric,
you will need to cut each piece of it in half, and sew it back together
ends meeting so that you don't end up with one side of your bag upside
down!
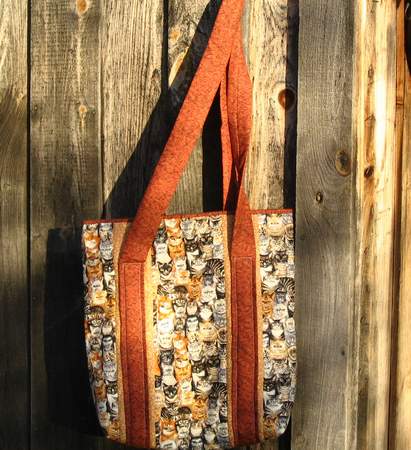
This bag is really easy to make, durable,
machine washable, and fun to use. It doesn't have any pockets, although
one could easily be added.
I use mine for carrying my knitting or hand-sewing, carrying things to
my Mom's, going to meetings, and lots more!
I also make them to hold gifts for birthdays, anniversaries, etc. They
make a lovely, reuseable alternative to wrapping paper.
|
A word about materials. I recommend using a cotton batting for several reasons. First, this project needs to be ironed many times through the steps, and a batting with a poly/cotton content can harden or flatten, ruining your bag. Second, it is flatter and denser, and will aid greatly with avoiding wrinkles or catches. And it is all-natural!
|
A word about pressing: It is essential to press when directed. This bag is quilted as you sew it, and you can avoid most wrinkles or catches in the fabrics if it is pressed carefully. Magic Sizing is a great tool! It is about the same as Spray starch, but does not leave the white flakes behind. It will help you flatten the fabrics for accurate sewing.
|
|
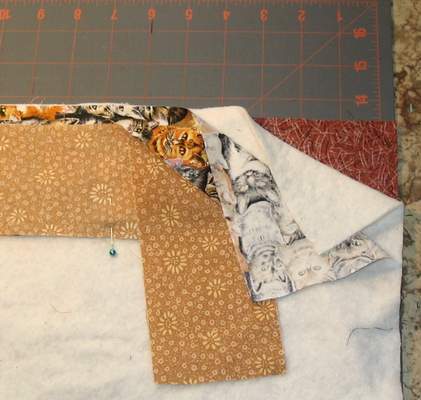
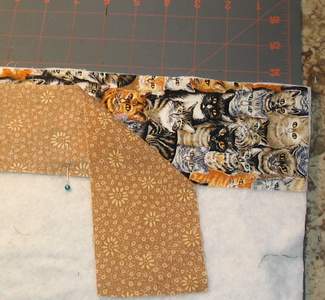
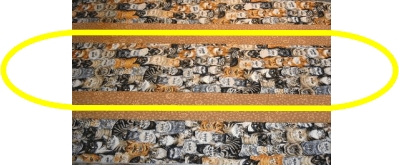
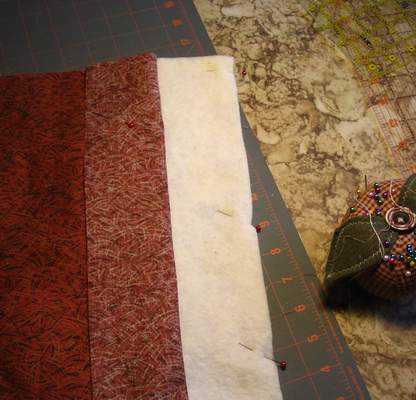
Step One: Cut all of the fabric as described in the
Supplies Needed section. Lay the lining right side down on your table, with the 32" edge at the top and the 16" edges as the ends. Center the batting over the lining. Next, take one of the 5 1/2" x 32" Fabric number 1 strips, and lay it right side up on the very top of the lining/batting. Finally, take a 3 1/2" x 32" Fabric #2 strip and place it right side down over this. You need to line up this strip with the bottom of the previous strip. Before you pin this, run the iron over it to flatten the fabrics. Place pins every few inches. Refer to the pictures if this sounds confusing. Photo A. shows all the fabrics in the order to place them.
Photo B. shows pinning the Fabric #2 strip to the layers.
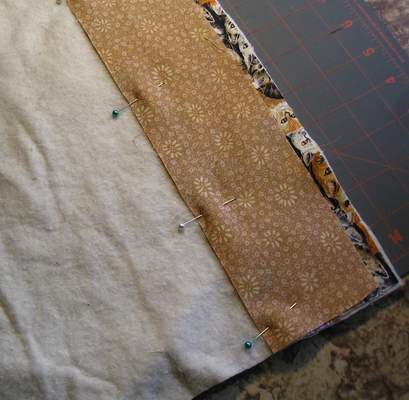
Photo C. shows everything pinned into place prior to sewing. Please note that the fabric strips are not the same width, so of course you will see some of the first strip at the top. Now, carefully sew this pinned seam through all the layers. Use an accurate 1/4" seam. Remove pins if you have not already done so.
Once this is sewn, spray a light mist of Magic Sizing onto the seam, press, open the piece out, spray again, and press carefully. Ironing the just sewn seam helps to set and flatten the thread. |
A. B C |
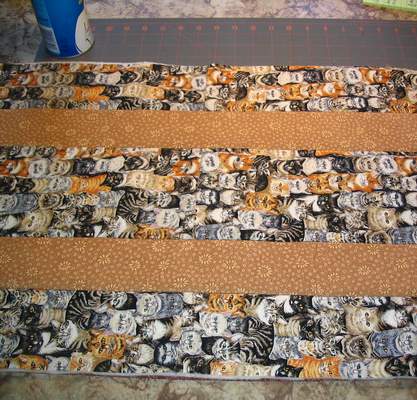
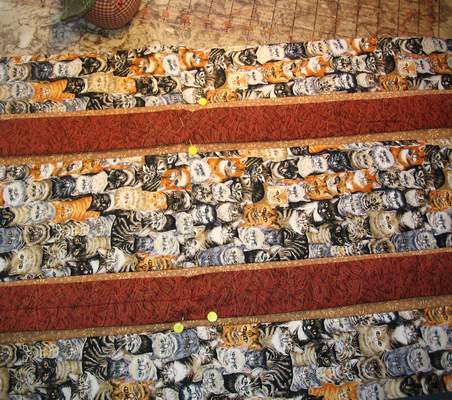
| Step Two: You will repeat Step One for this row. In this step, make sure you are sewing the center strip (5 1/2" strip) in place. Finish the rest of the rows by adding the last Color #2 strip and finally the last Color #1 strip. Make sure to press as indicated between each step. |
|
|
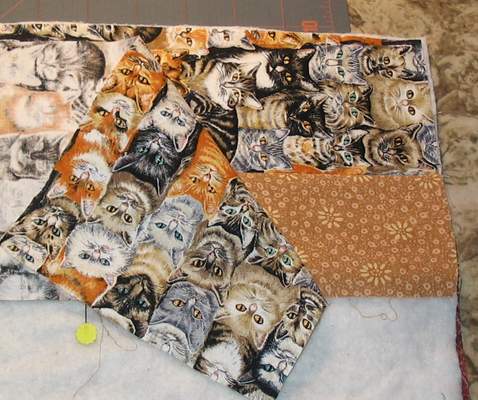
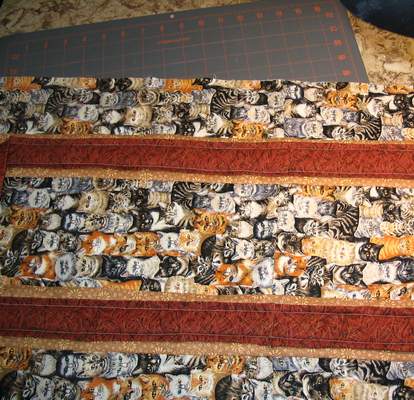
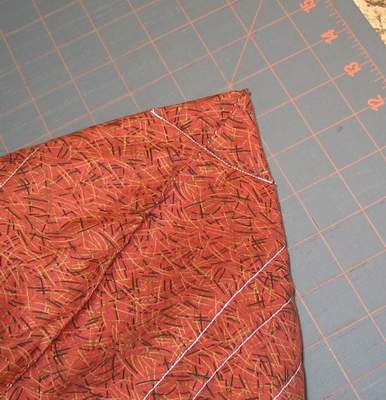
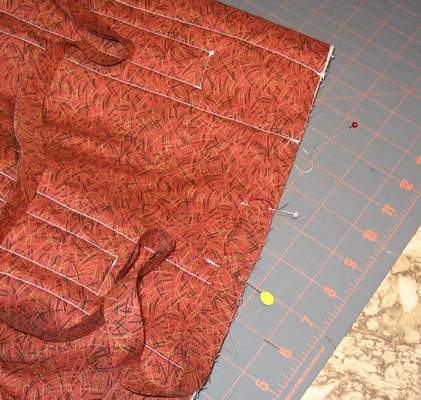
When Step Two is finished, your piece should look like the first photo on the right. Press this carefully.
In the second photo you can see the lining. Normally, I would have used matching thread to hide these lines. However, I wanted you to be able to see the quilting. Set these pieces aside for now.
|
|
|
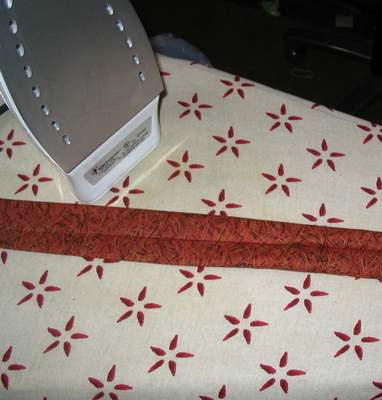
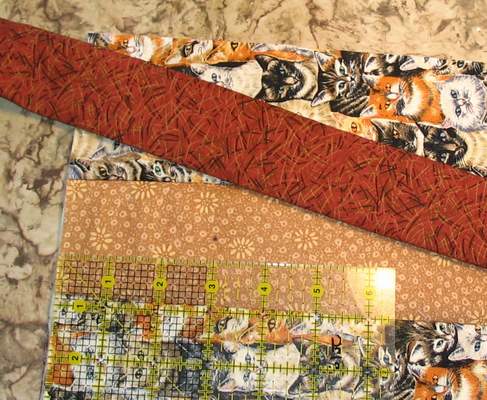
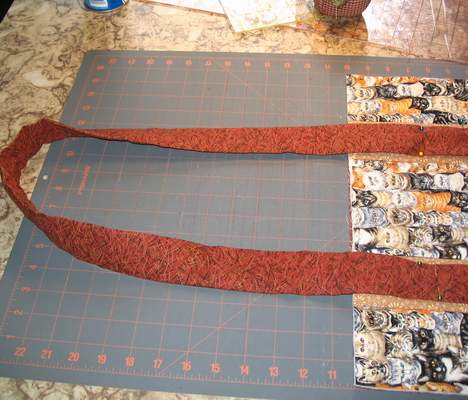
Step Three: In this step, you will be making the straps. First, sew all three pieces of the 4" x wof straps end to end to create one long strip. Second, press this lengthwise in half, right sides together. This will make it a thousand times easier to sew! Next, sew the strap with an accurate 1/4" seam, down the entire length. Turn it right side out, and press with the seam in the center, as shown. You want to press the seam in the center to hide it when you sew this onto the bag.
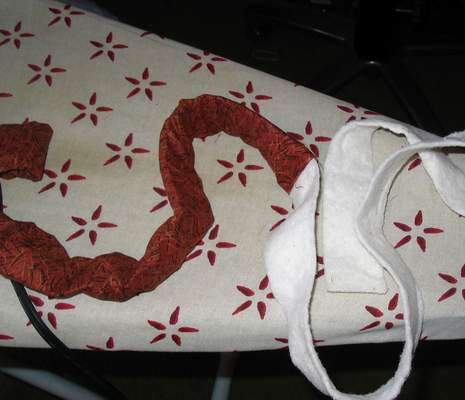
Step Four: Take the strips of batting for the straps, and sew them end to end as well. This needs to be inserted into the strap, and I will tell you right now it is not easy. However, it is doable! Method A: Pin a large pin into one end, insert it into the strap, and work it all the way to the other end, pulling the batting gently as you go. Method B: Use a long hemostat to reach through the strap, grab the batting, and gently pull it through. I usually use this method. Work the batting around a bit to make it lie flat if it is not flat inside the strap. Press again, using a light spray of Magic Sizing to help flatten it.
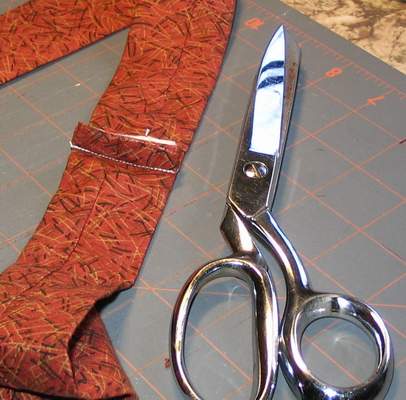
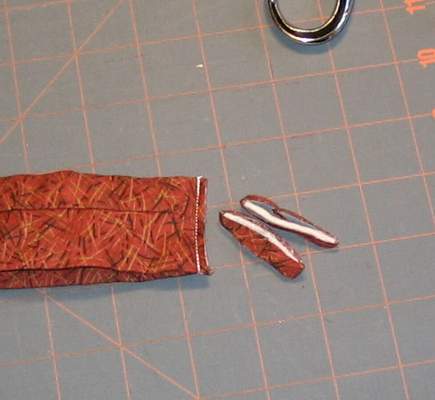
Sew the ends together.
And then trim them down to a very small seam.
This is a good time to trim away any waste on the body piece from the previous steps, too. Make all the edges the same through all layers. |
|
|
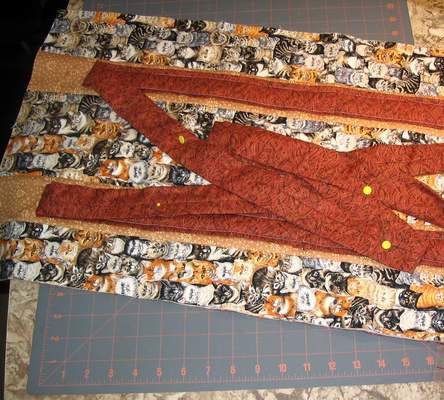
Step Five: In which we add the straps! Find the seam where you sewed the ends of the strap together. Place it, face down, on the center of your body piece. Refer to the picture--the pins show the center spot.
Next, measure 3" down from each end and place a small dot. This is as far up as you will attach the strap. Pin this in place.
I used two pins to make sure I was able to tell where the dot was under the strap. Do this on all four places where the strap is.
When you are done, it should resemble this:
Pin all the rest of the strap into place. Make sure you do not twist the ends around! It should be like pinning on a giant oval. |
|
| Step Six: Sew the straps in place with a 1/4" seam on both sides. When you reach the ends where you placed the dot, simply sew across. Normally, I would have used matching thread to hide the stitching, but I wanted you to be able to see where to sew. |
|
|
Step Seven: Pin the straps out of the way in the center, as shown.
Turn the piece over to the lining. Pin the sides of the lining back as shown, leaving the front and batting in place.Fold the piece in half, and securely pin the sides (which will be the front and batting layers) and sew with a 1/4" seam. Trim the seam down when finished. |
|
|
Step Eight: Now, unpin the lining, and finger press a 1/4" seam under. Pin this together over the seam created and trimmed in the previous step, and handsew it shut. This created a nice, finished seam inside the bag. Repeat for the other side. |
|
|
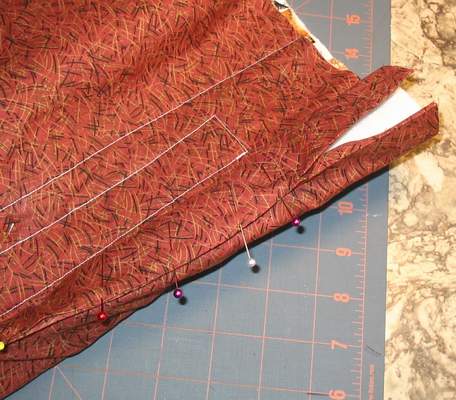
Step Nine: We will create the deep bottom part now. Take the bottom corner created by sewing the side seams, and 'open' it so that the hand-sewn seam is now in the center, as shown. This is hard to describe, but try to hold the bag by the sides, and pull them out, and center the hand-sewn seam.
Measure down 1 1/2" from the very corner, and sew across. Repeat for the other side. You can cut this off if you want, but as it doesn't hurt anything, I generally leave it.
When you turn the bag right side out, you can see that you have created a square bottom. |
|
|
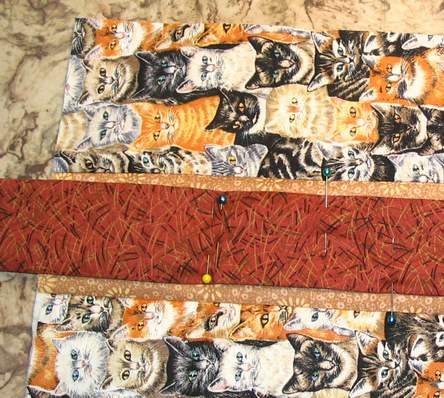
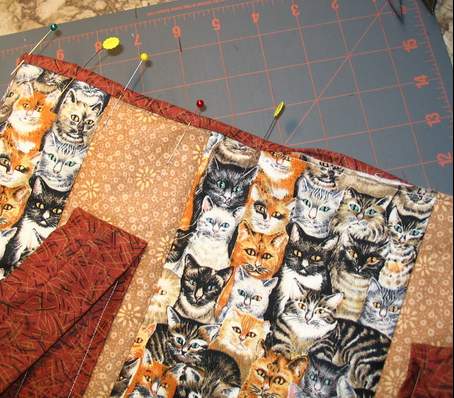
Step Ten: the final step! The last step is to add a finished edge to the top of the bag. Take your edging strip (1 1/2" x 32") and fold one end under 1/4". Then, press in half lengthwise with your iron.
Next, raw edges together, pin in place. Start someplace not on an end, and start with your strip end that was folded under 1/4". It is hard to see in the picture since I used the same fabrics, but the raw edges of the top of the bag and the raw edges of the edging strip are touching.
Pin all the way around. When you get to the starting point, overlap about 1/2".
Sew all the way around with a 1/4" seam. Trim the seam down.
Fold the edging up from the inside and over to the front. You already have a finished edge from folding and pressing in the first part of this step, so all you need to do is pin it down and hand-sew it in place.
|
|


Thinking about embellishments? Craft buttons
added at the strap tops are cute! Or, applique something there.
Changes can also be made to your next bag--make the straps narrower or
the strips wider! Use a novelty print
to make your bag personal. Add a pocket to the outside (before adding
the straps, and remember, the straps
will need to go through it so plan pocket size accordingly) or one to
the inside. I like to add one to the inside that
is as wide as the bag, and can be sewn on when I sew the side seams in
place.
Send me pictures of your finished bag, and I'll add them to the students page.